Step 1 – Create Voyage in STEAR (VVS)
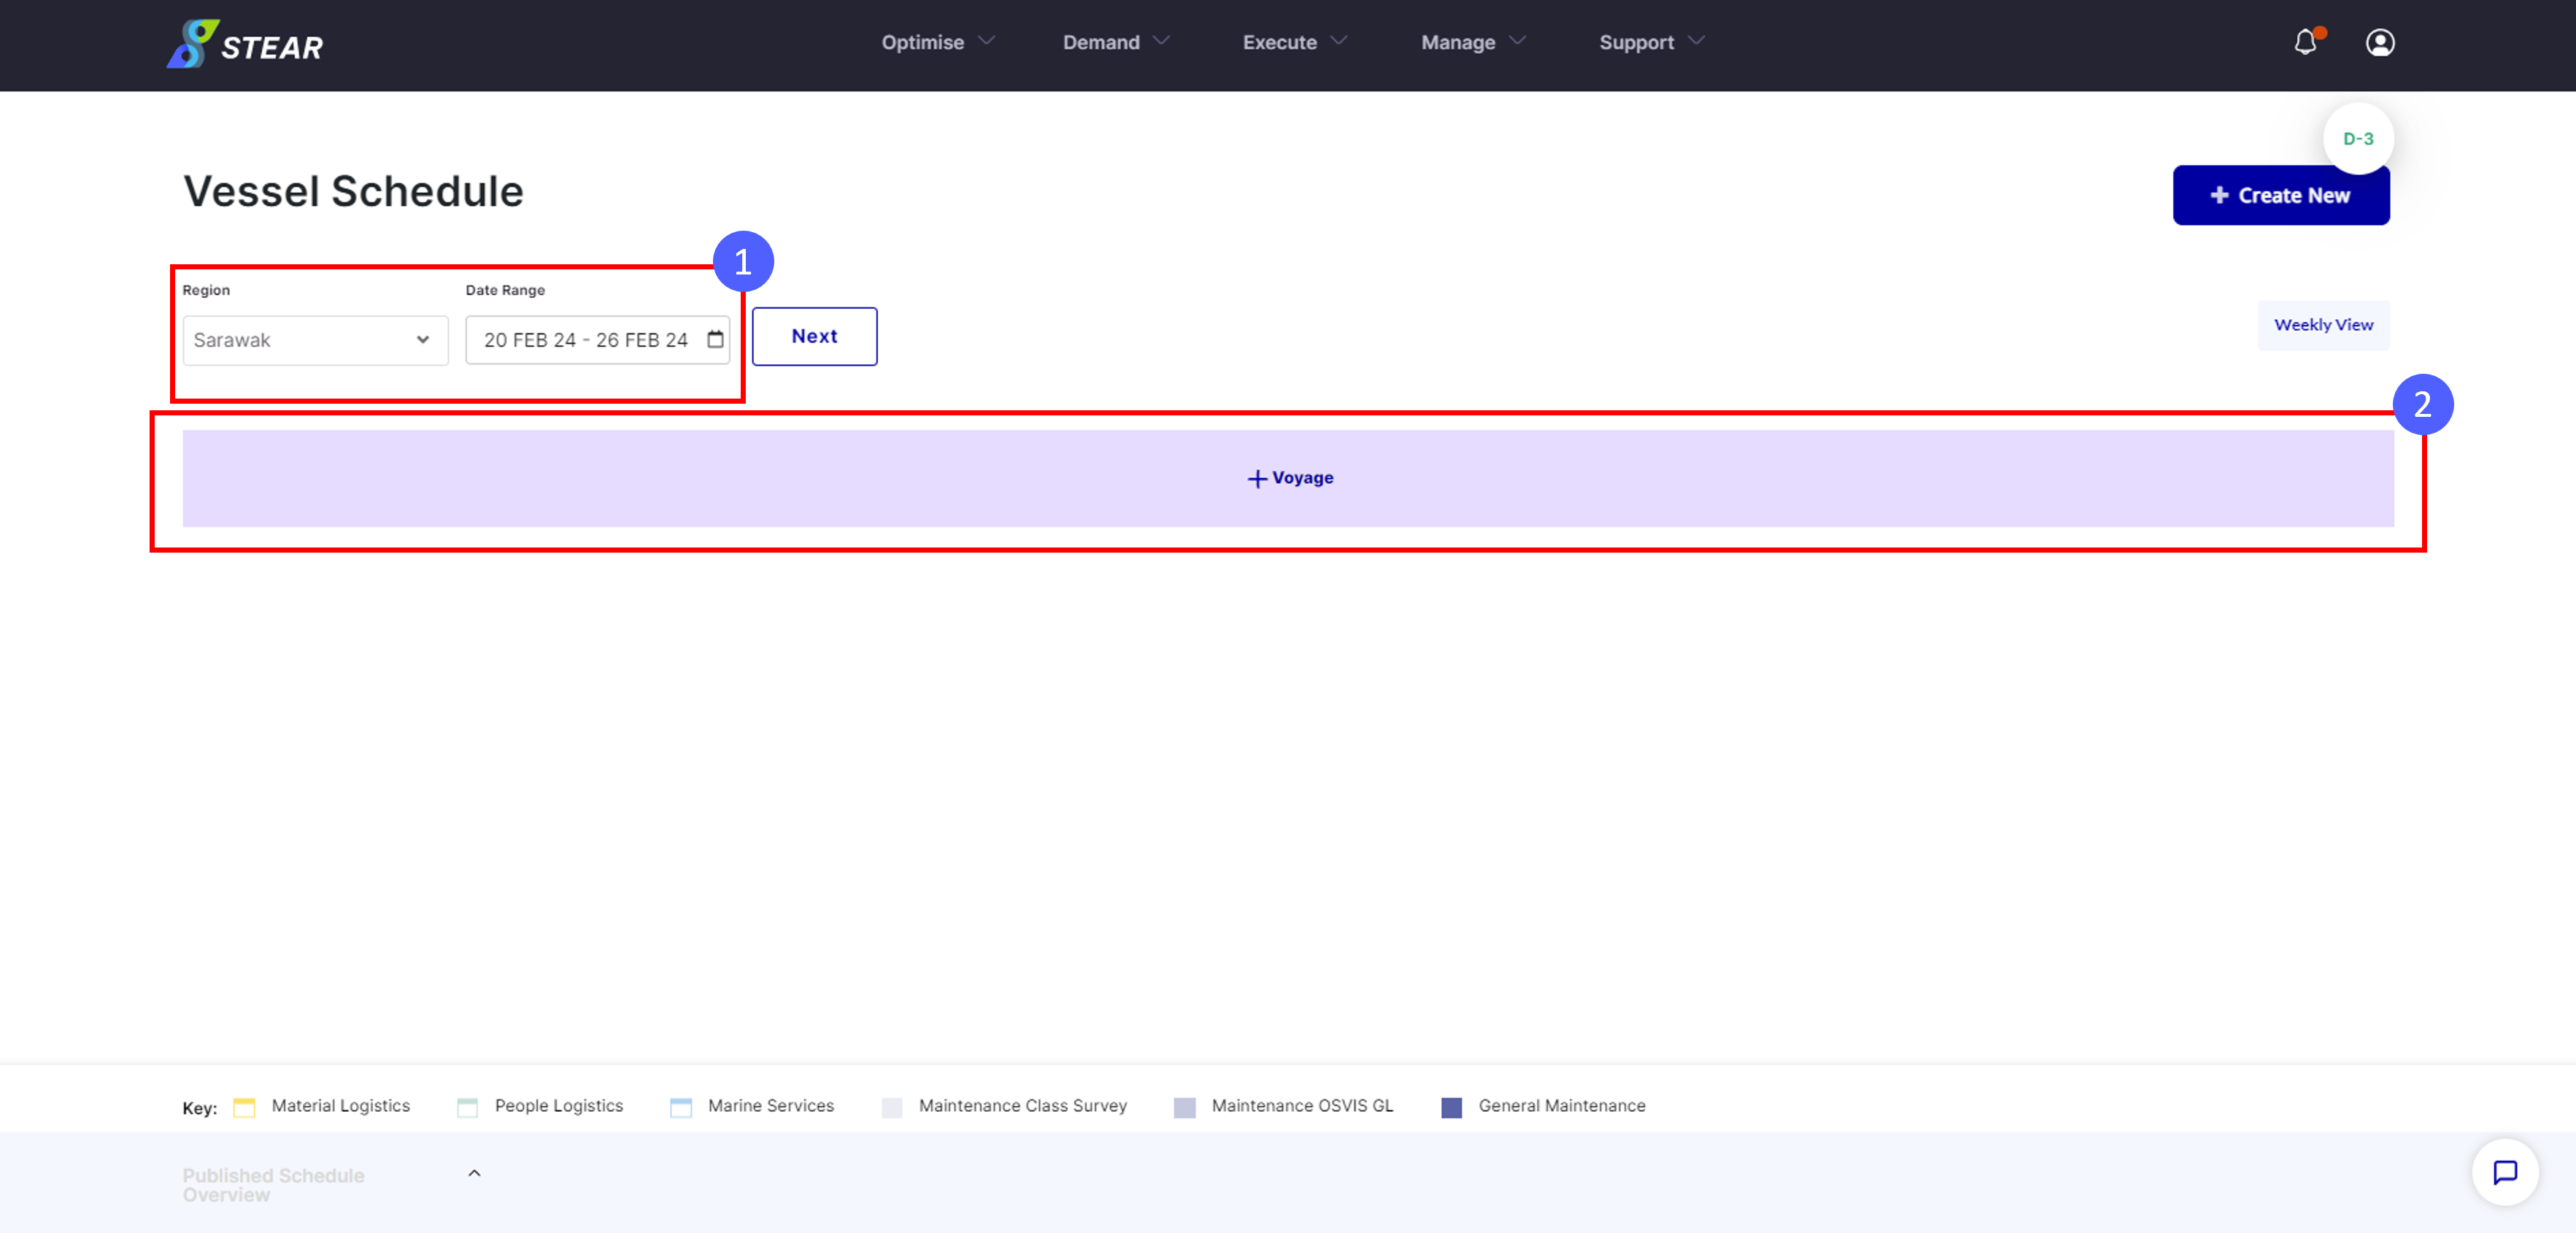
Go to Optimise > select View Vessel Schedule (VVS) > select Region and Date Range > click ‘Next’ > click ‘+Voyage’.
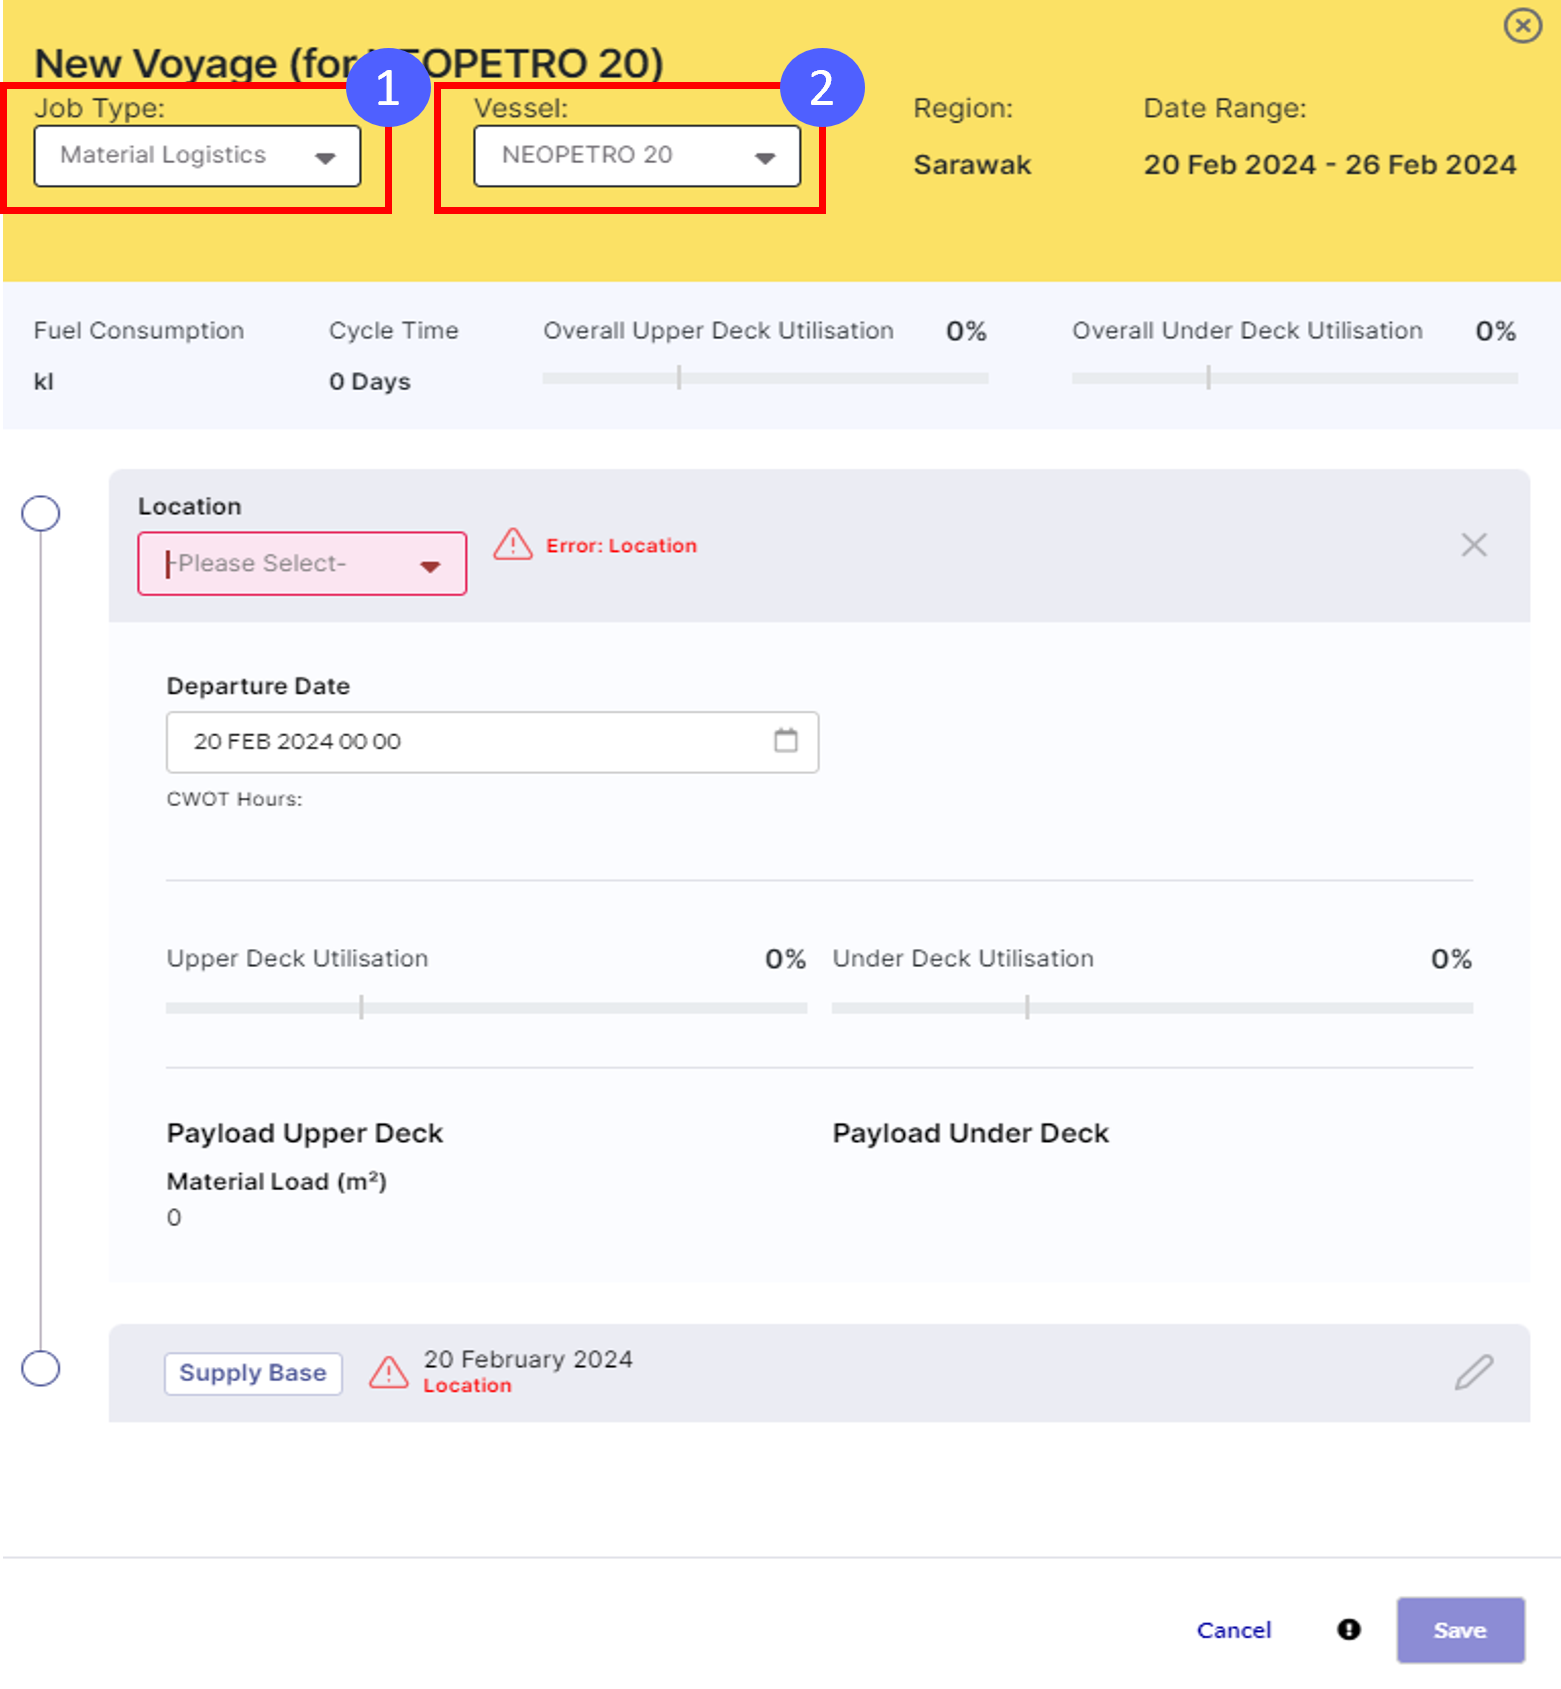
(Continue) Create Voyage in STEAR (VVS):
Select ‘Material Logistics’ as Job Type > select any available vessel as Vessel.
(Continue) Create Voyage in STEAR (VVS):
Select Supply Base as First Location > click +New Location > select platform / FPSO as Second Location > click ‘Save’.
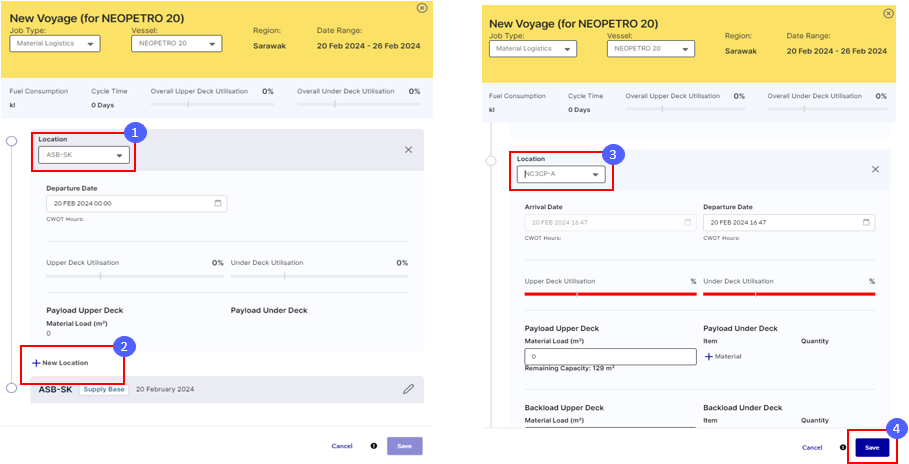
Note :
- Repeat step no. 2 & 3 to add more locations in one voyage.
- Kindly note that the last location will automatically be filled with the same location as the first location (supply base).
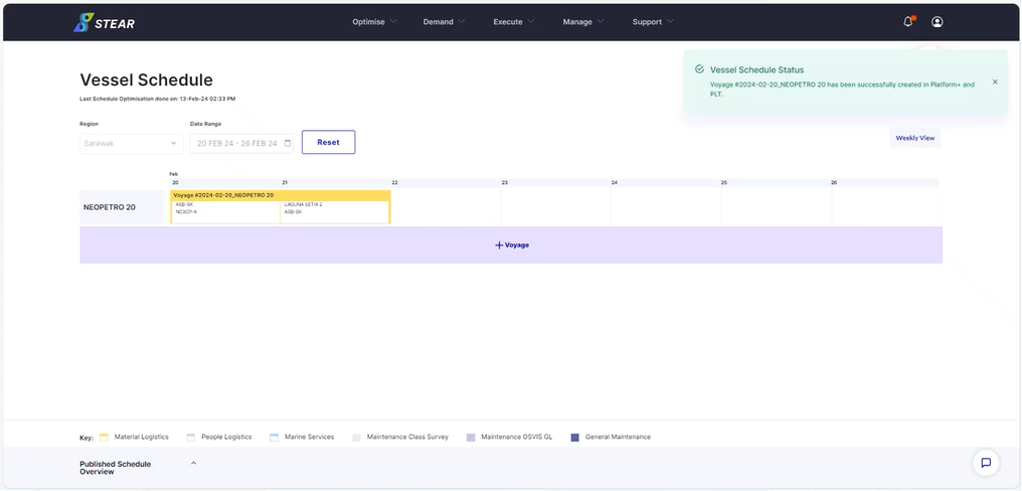
(Continue) Schedule Successfully Created:
Schedule have been successfully created in VVS and pushed to PLT.
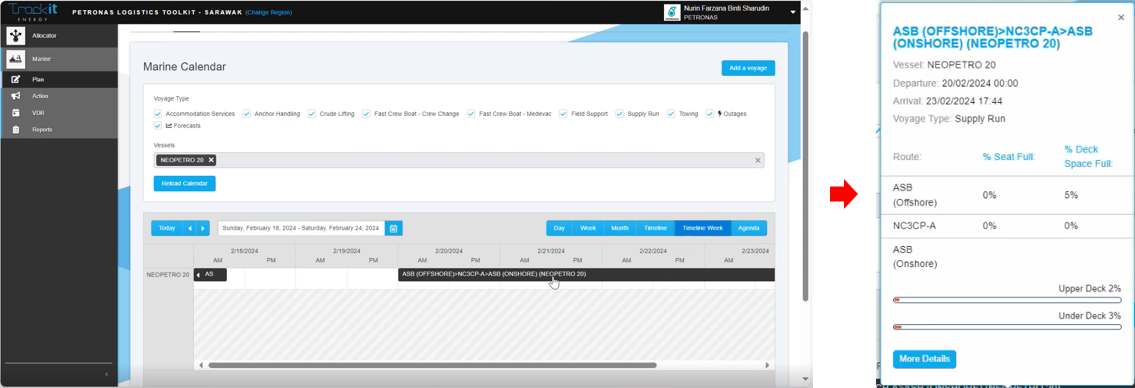
Step 2 – View Schedule in PLT (Plan)
Successfully created voyage will be reflected to PLT. To view, go to Marine > Plan > select Date. Select voyage and click ‘More Details’ to see further.
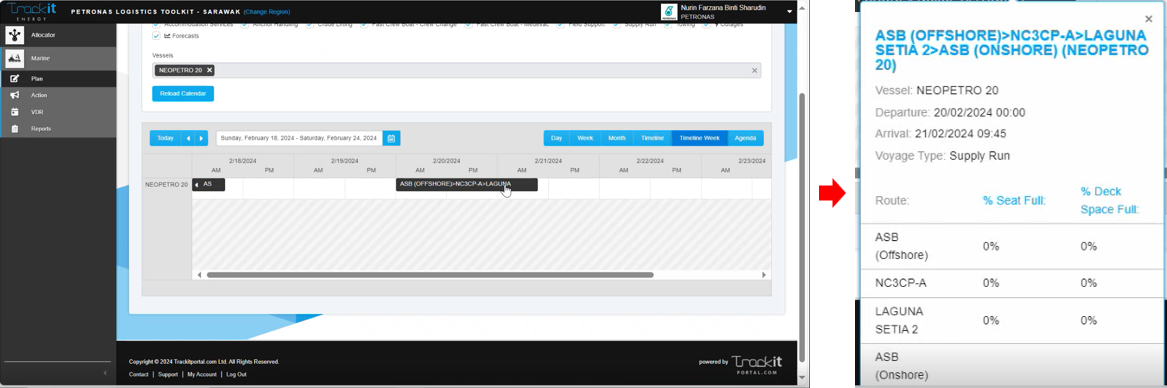
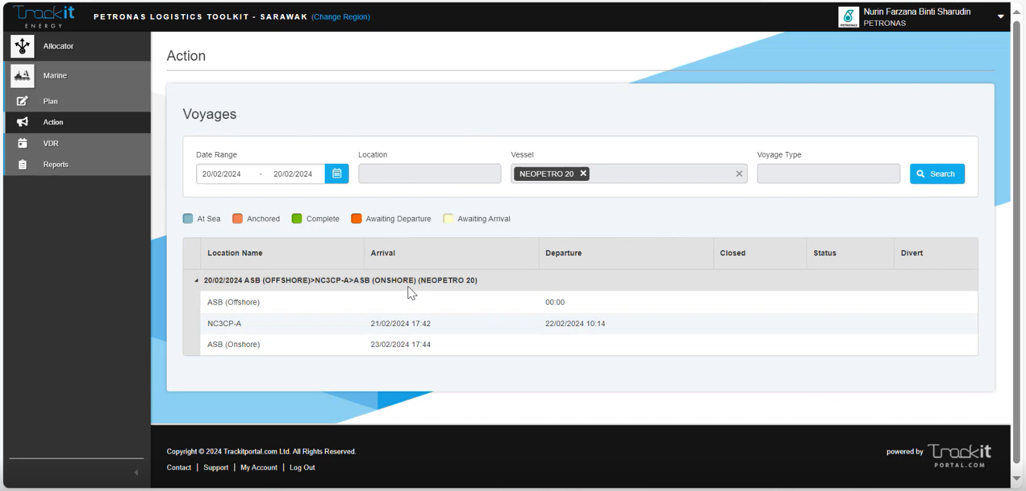
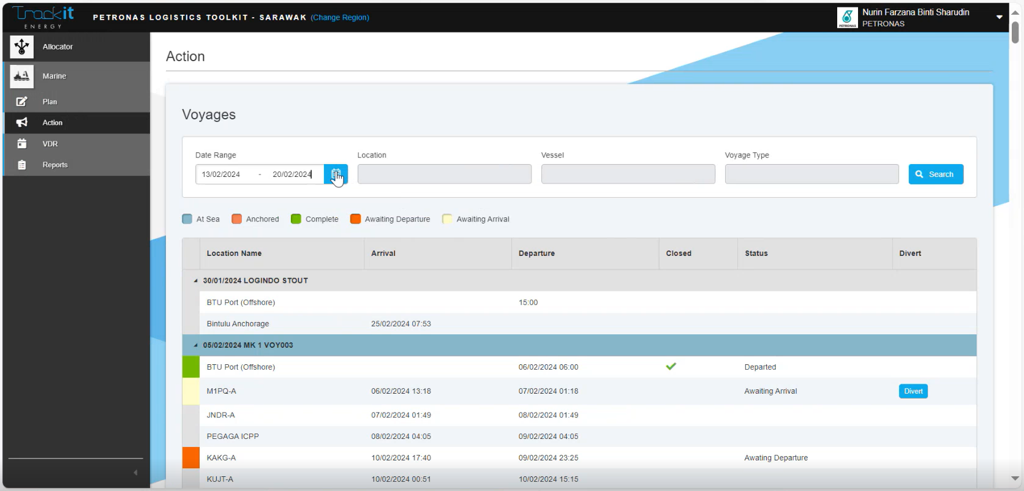
(Continue) View Schedule in PLT (Action):
Go to Marine > Action > select Date Range and Vessel > click ‘Search’. Click on the voyage name to see the details.
Step 3 – Allocation of Demand in PLT
Demand allocation in PLT will be completed by MM in the same voyage ID that was created in STEAR.
Demand allocation includes :
- Payload upper deck
- Backload upper deck
- Fuel Oil & Fresh Water
Step 4 – Fetch Demand Data from PLT in VVS
Go to Optimise > View Vessel Schedule > Select Region and Date Range > click Next > click on the voyage to be optimised.
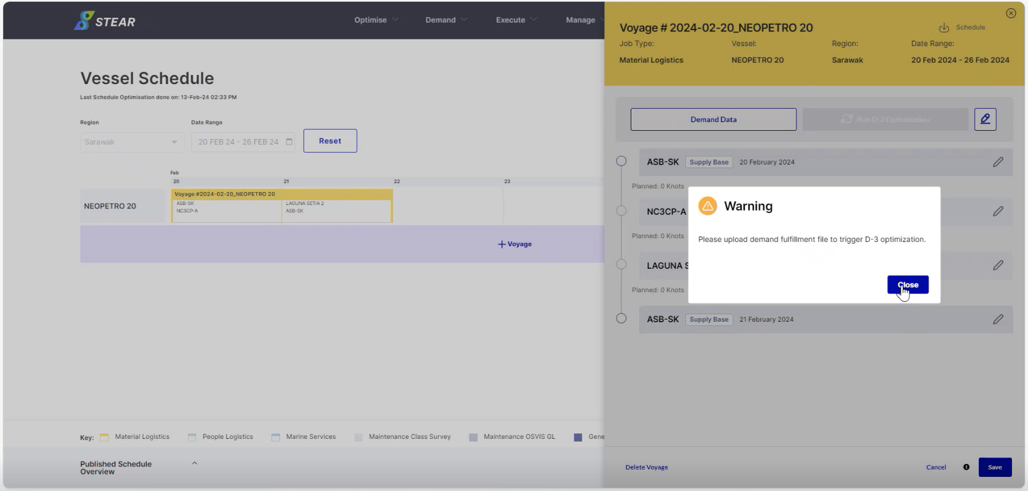
(Continue) Fetch Demand Data from PLT in VVS:
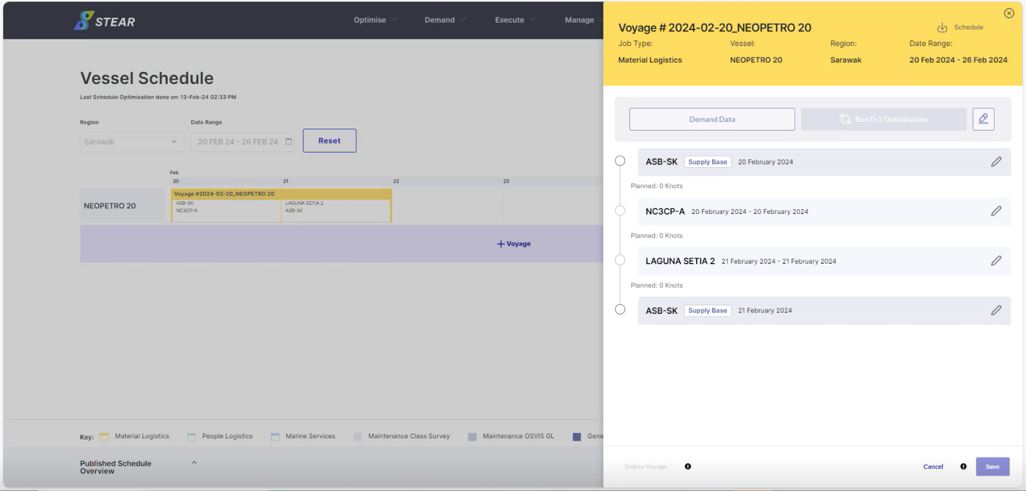
Voyage’s sidebar will display warning notification > click ‘Close’ since no demand fulfillment file need to be uploaded.
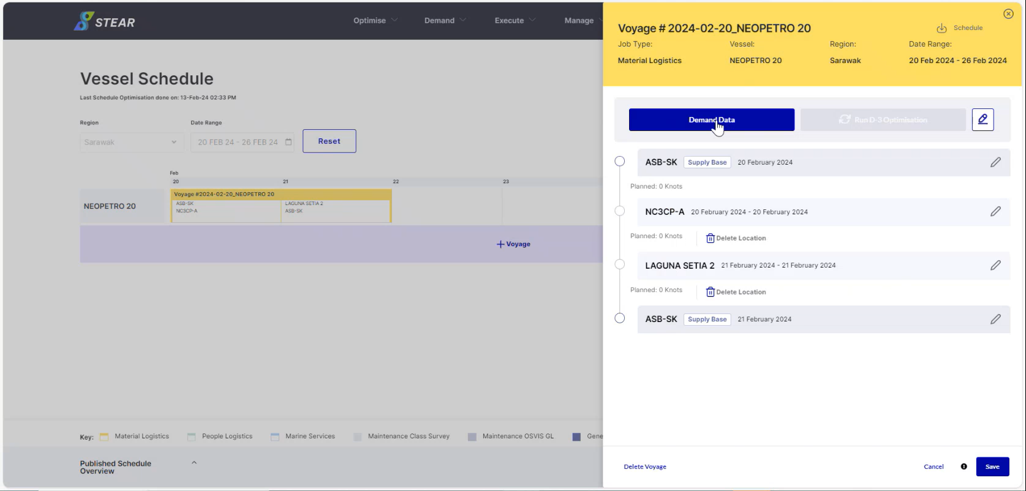
(Continue) Fetch Demand Data from PLT in VVS:
Click ‘Demand Data’ button. This process will take less than thirty second.
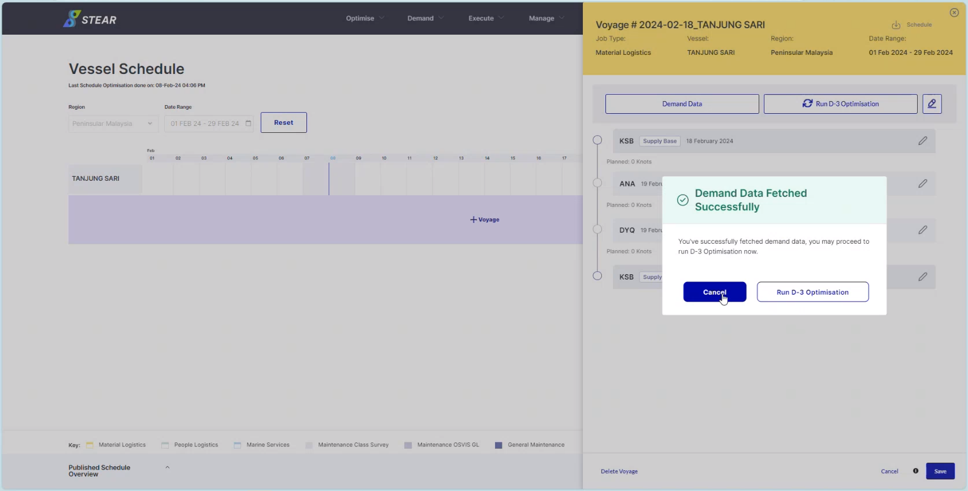
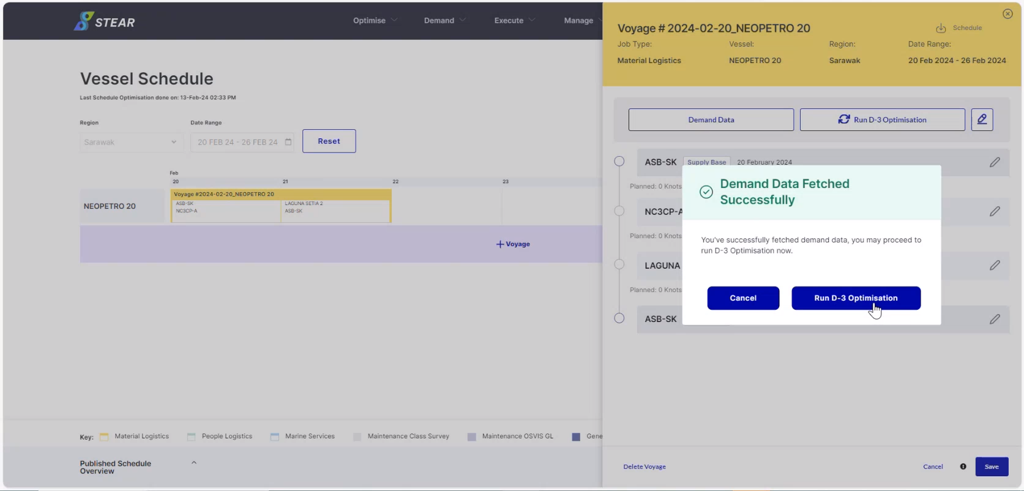
Opt. 1 – Fetch Demand Data from PLT to VVS
Demand Data successfully being fetched, and the system will display two options ; click Cancel if require to modify departure date/time and priority of location, or click Run D-3 Optimisation to start the optimisation.
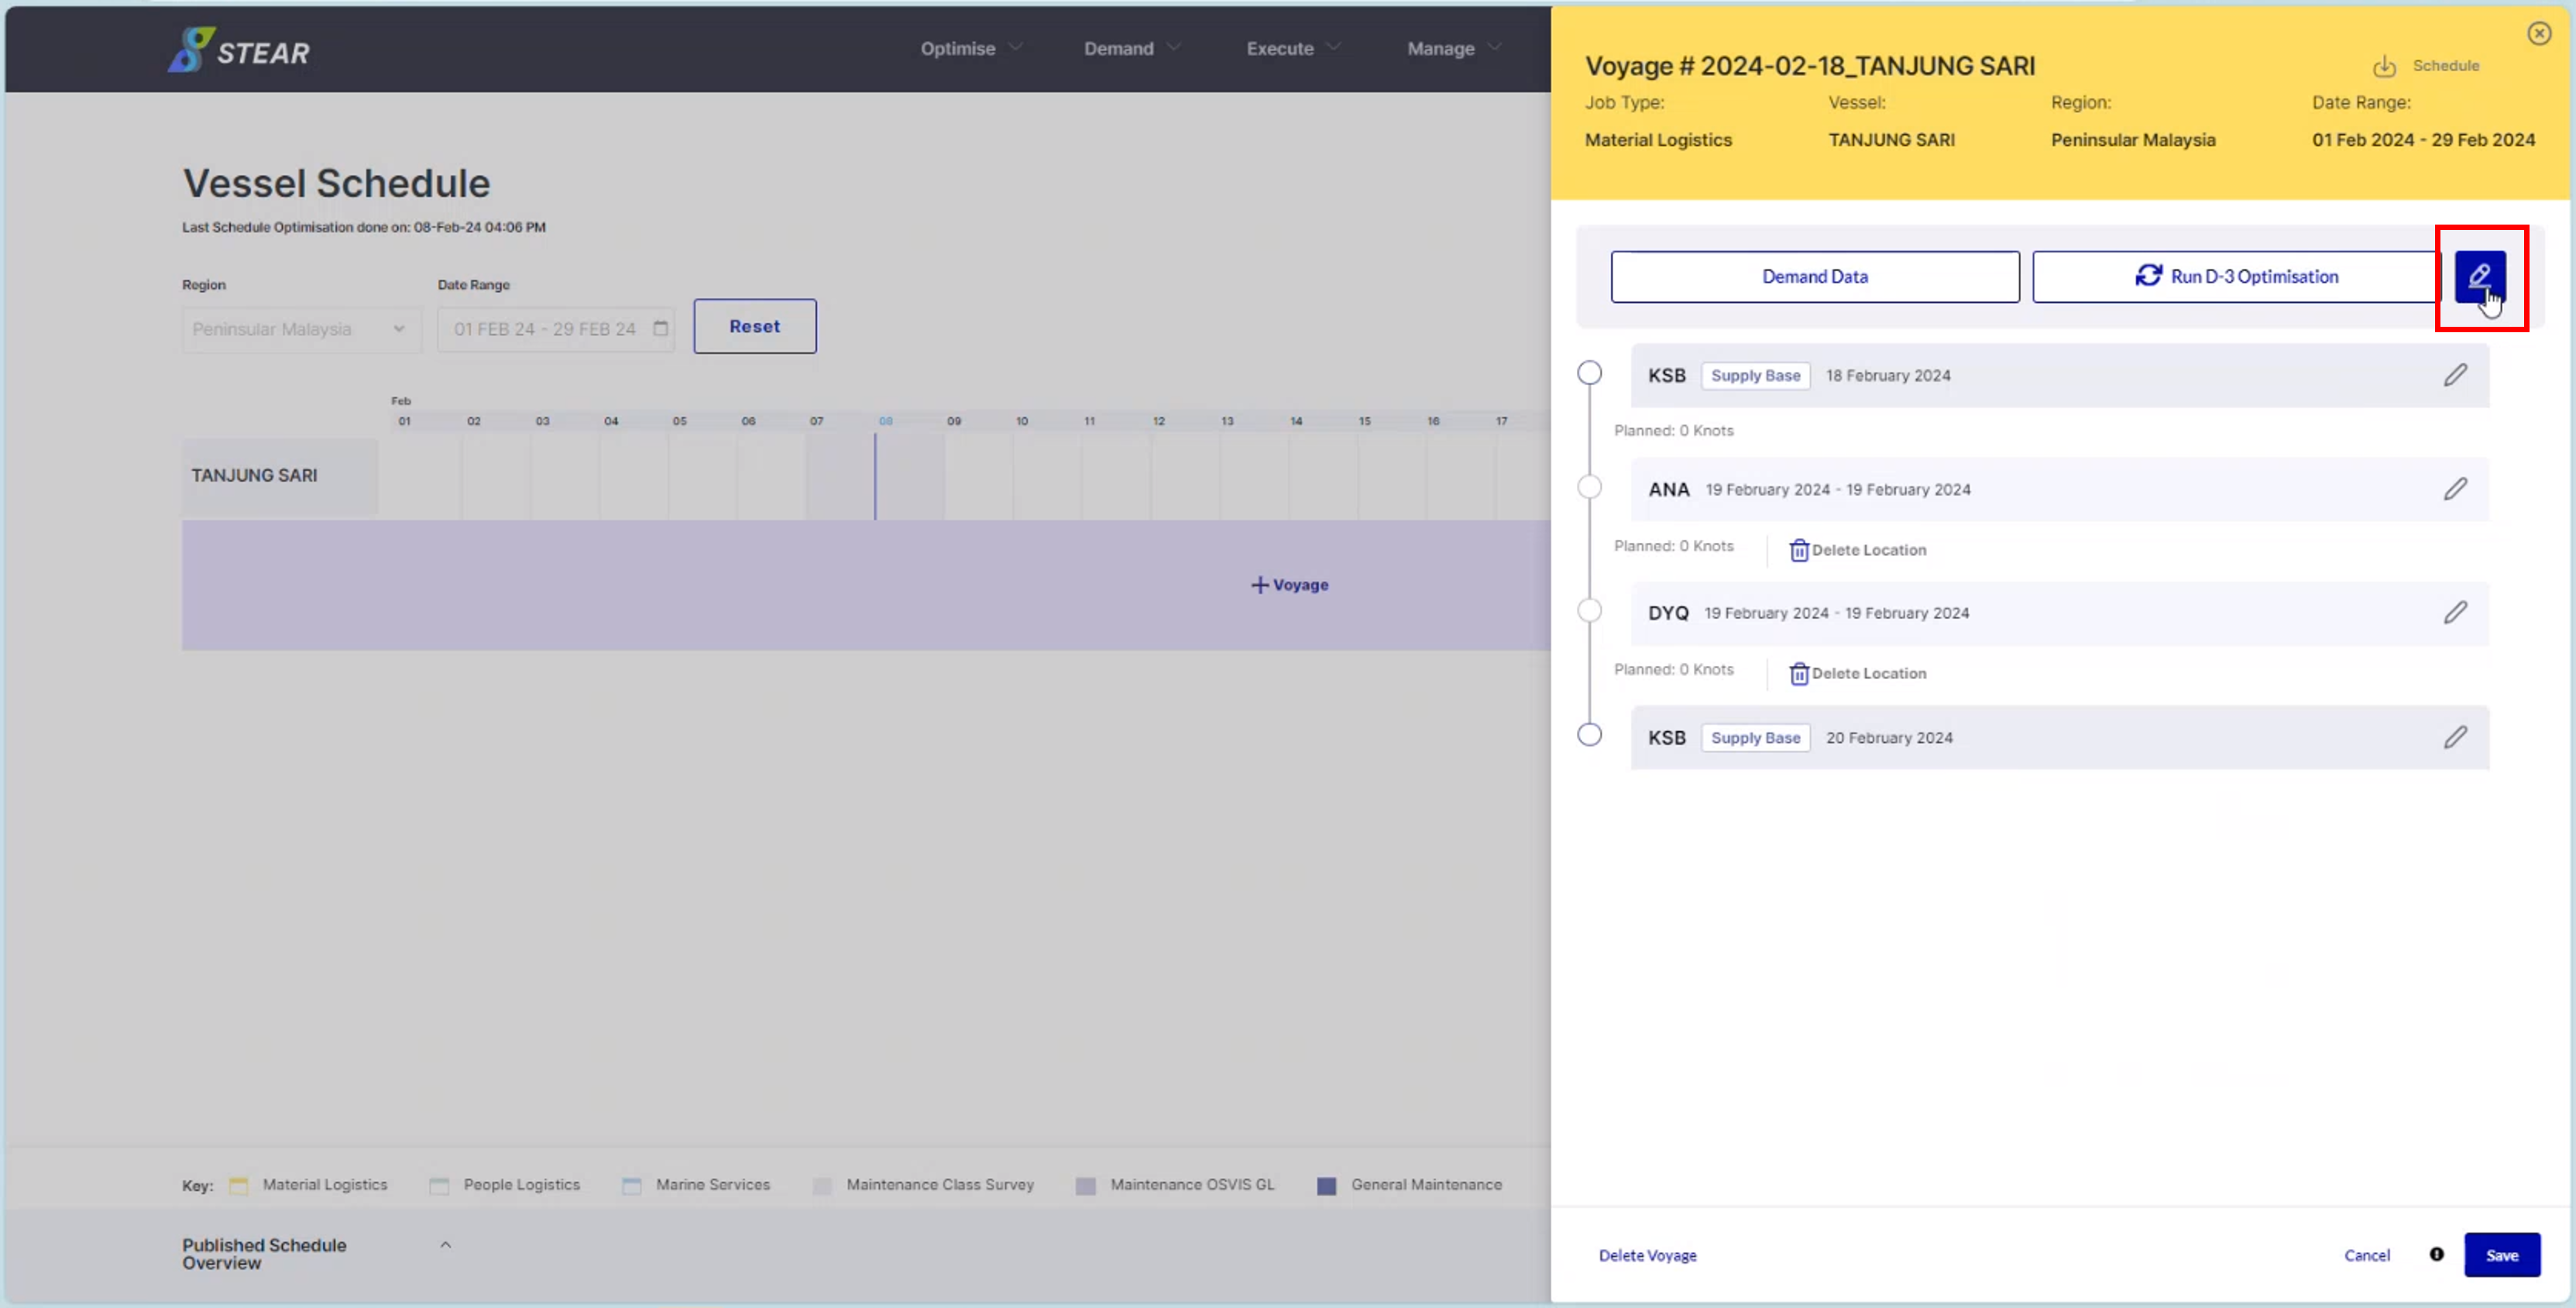
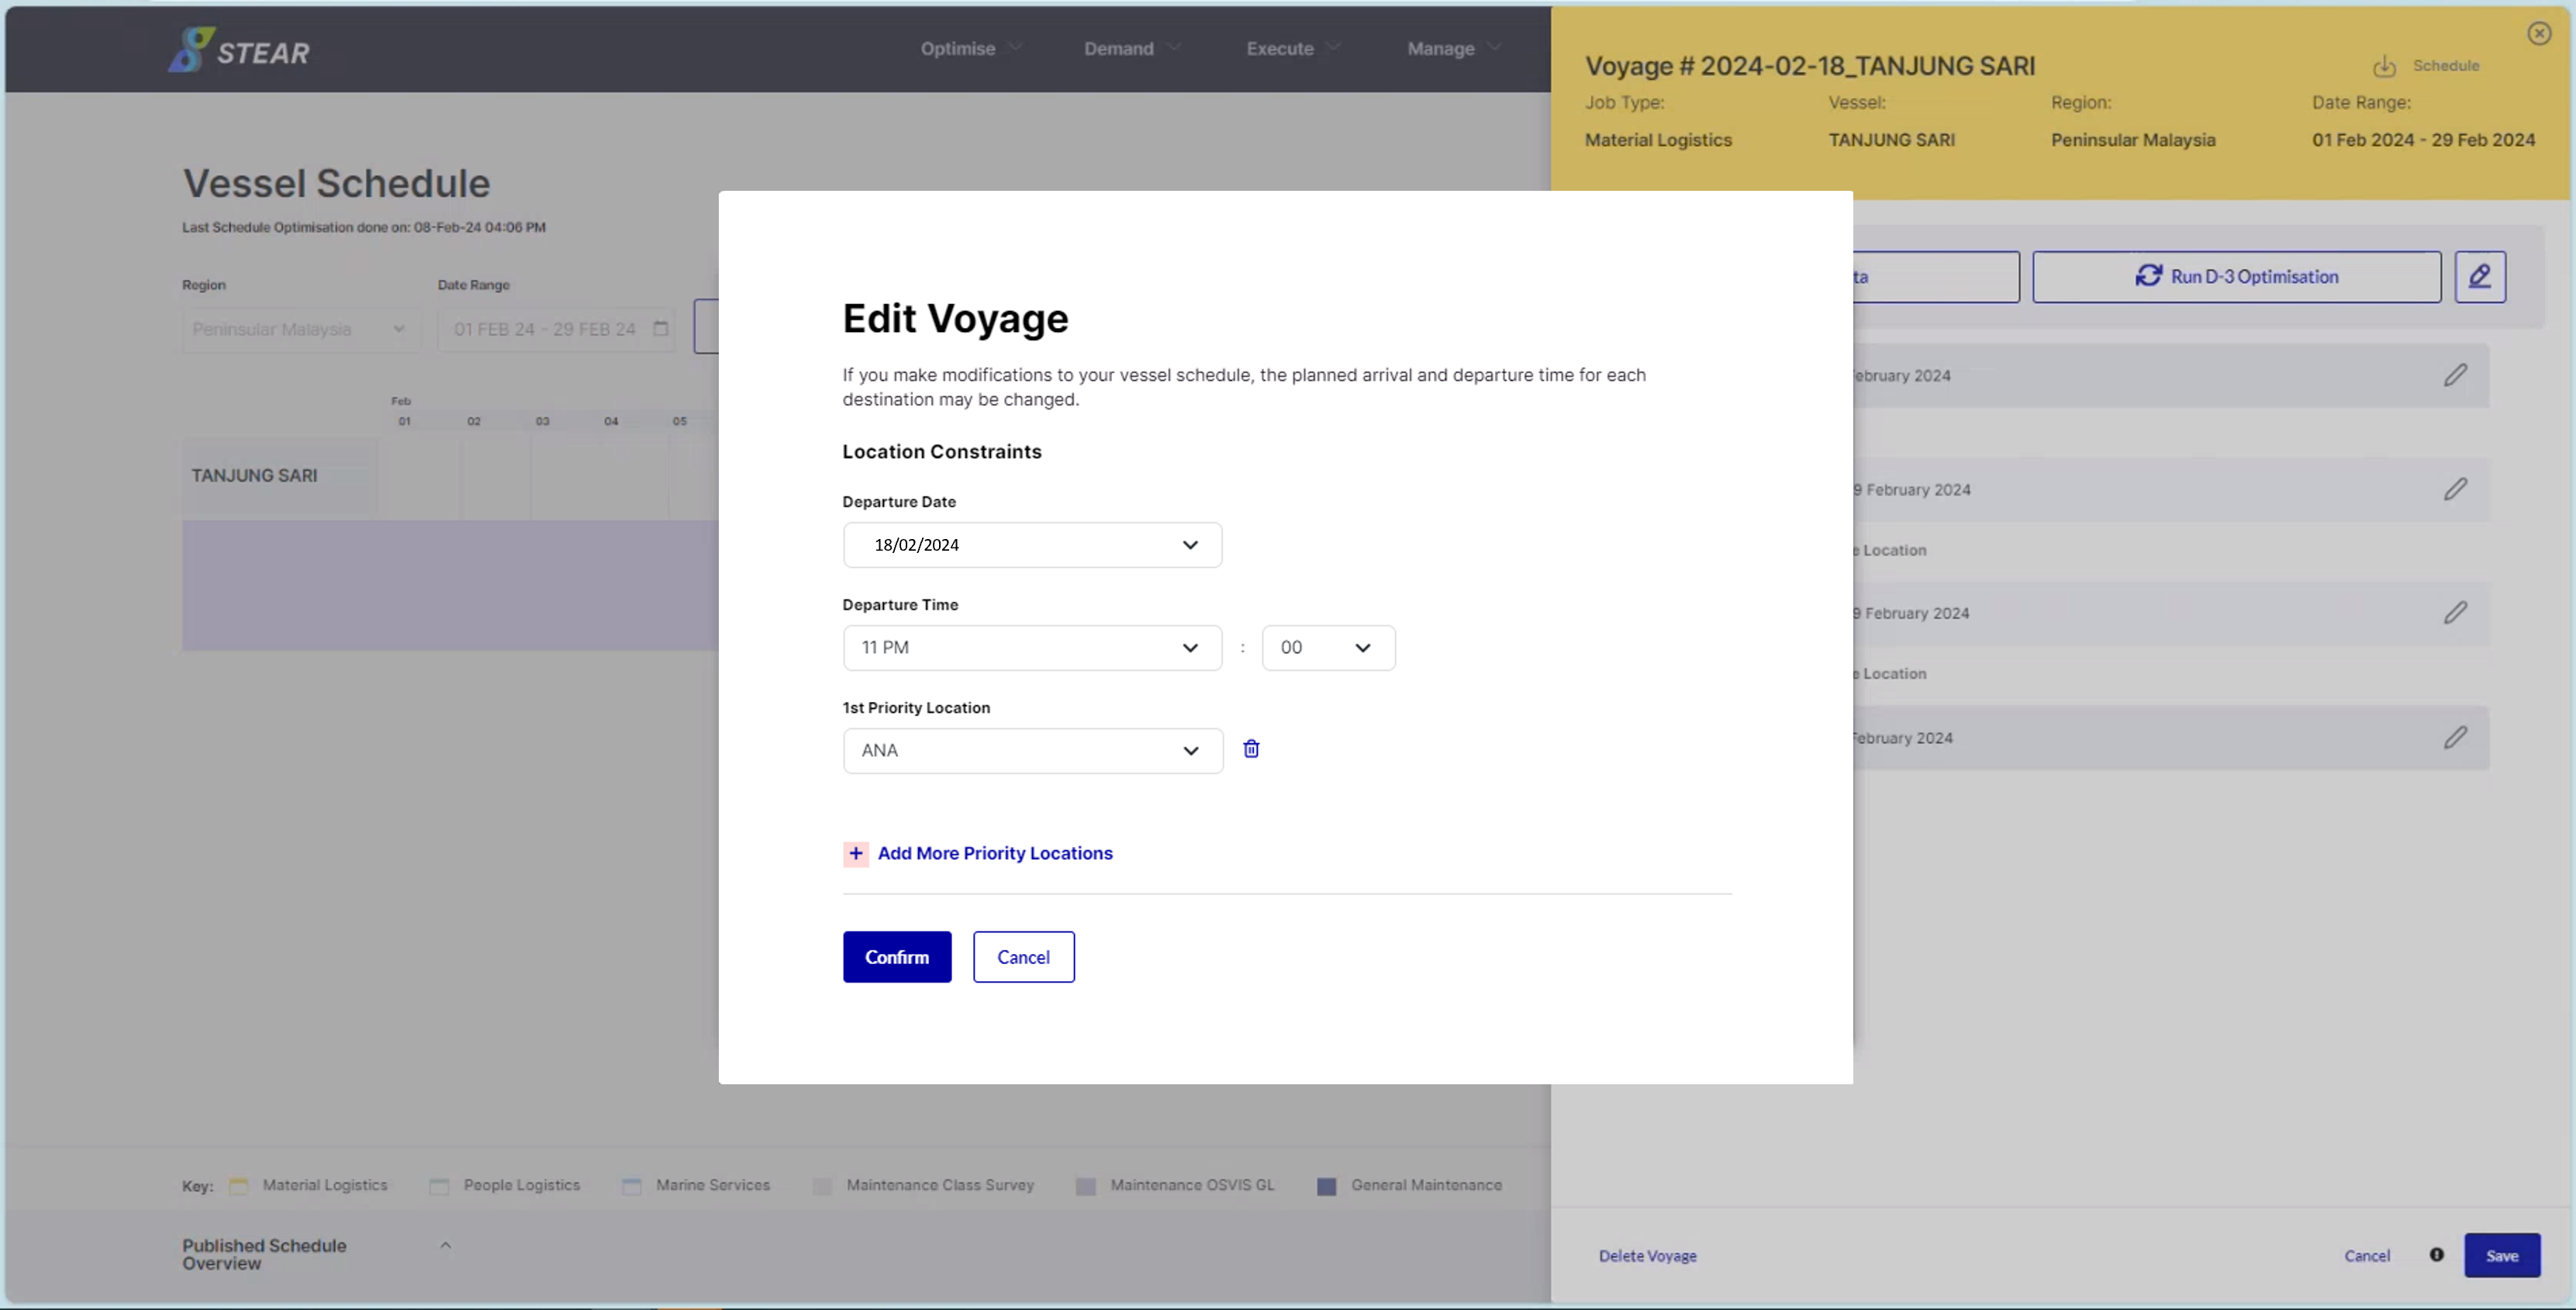
(Continue) Opt. 1 – Upon Clicked ‘Cancel’ :
Click ‘pencil’ icon to update the Departure Date, Departure Time and Location Prioritization.
(Continue) Opt. 1 – Update Time & Location:
User can update the departure date, departure time and set up to two priority locations, if any. Departure Date can be set up to 24 hours after from the original berthing date. Then, click ‘Confirm’.
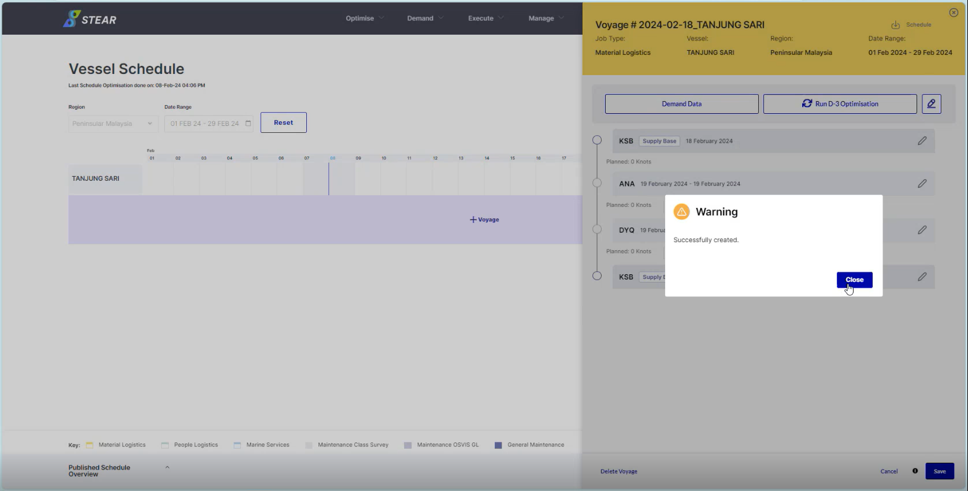
(Continue) Opt. 1 – Save Updated Data:
The data have been saved, thus click ‘Close’.
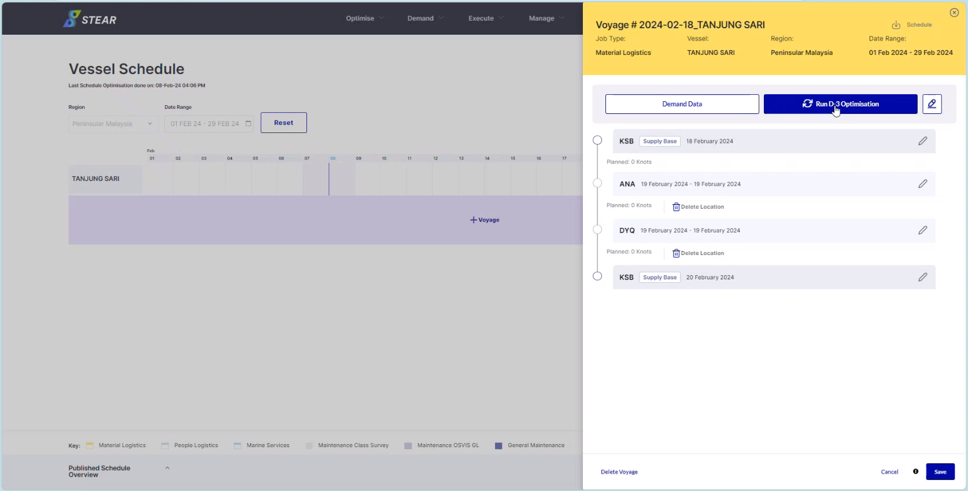
(Continue) Opt. 1 – Proceed to Run D-3 Optimisation:
Click ‘Run D-3 Optimisation’ button.
Opt. 2 – Upon Clicked ‘Run D-3 Optimisation’
Click ‘Run D-3 Optimisation’ button directly. Here, the system will run based on original berthing time / departure time and location from the first time creating a voyage in STEAR.
Step 5 – Run D-3 Optimisation
Following Option 1 or Option 2, the Optimisation process will take around 10 – 15 minutes. The successful notification will appear once it’s complete.
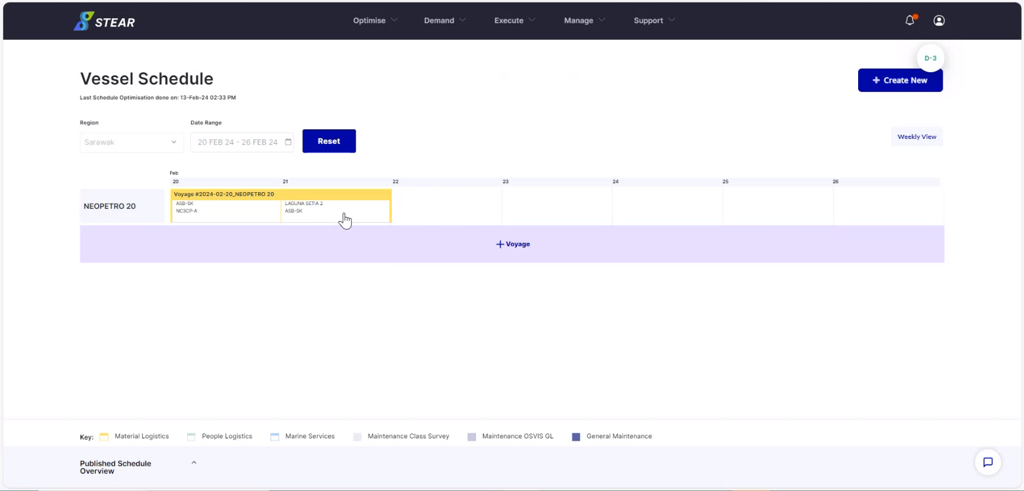
Step 6 – Optimised Schedule in VVS
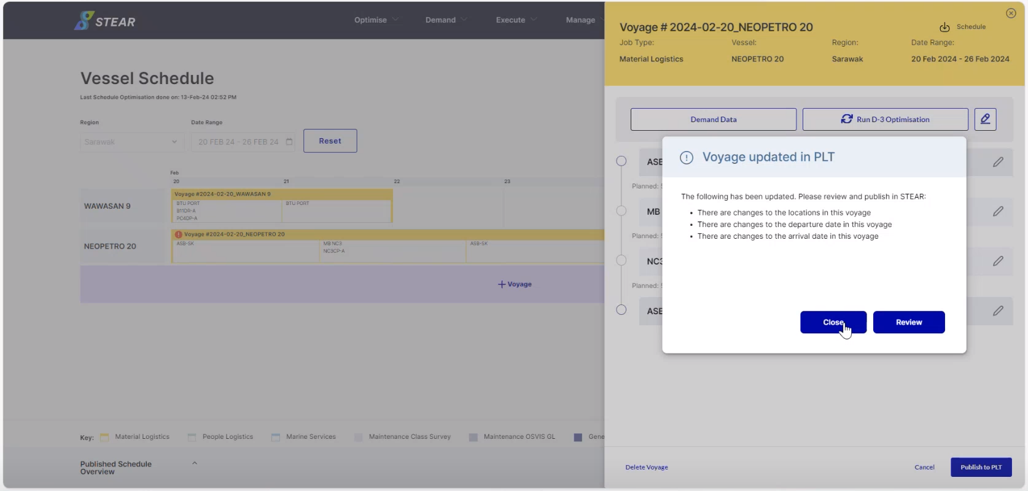
The system will prompt to the original page of VVS, thus click on the voyage itself again and this notification will appear. Click ‘Close’ to view optimised schedule as this optimised schedule is yet to publish to PLT.
Step 7 – Optimised Schedule to Publish to PLT
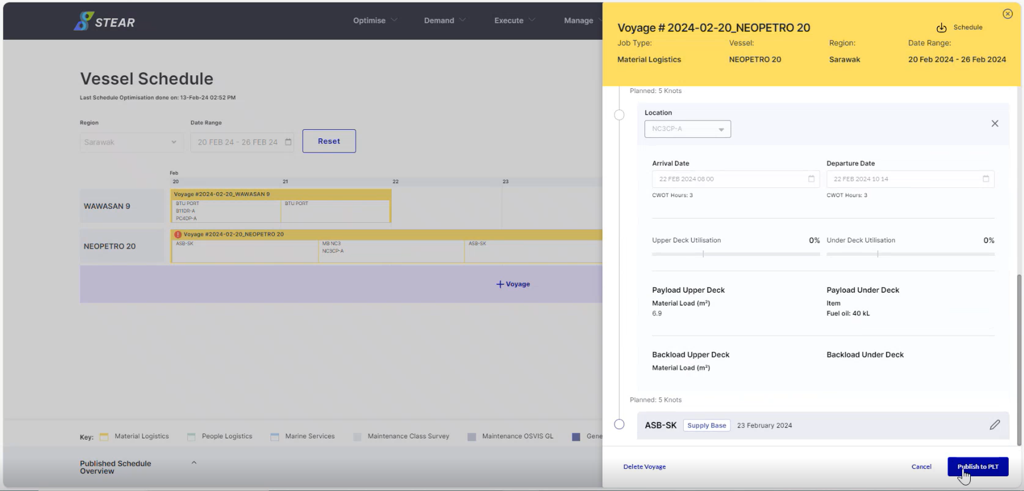
User can review the generated schedule first by clicking ‘pencil’ icon at each of the location. Then, scroll down and click ‘Publish to PLT’ button.
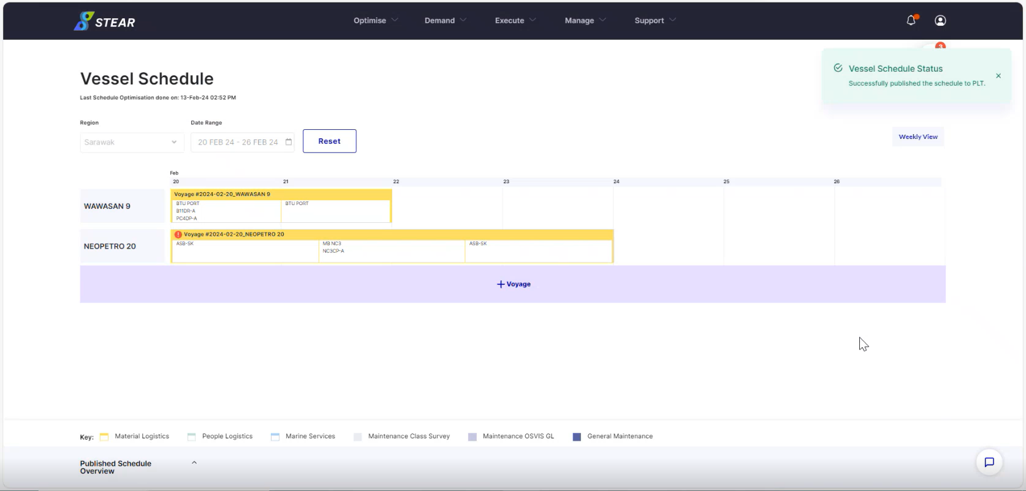
(Continue) Schedule Successfully Publish to PLT:
Green notification at the right top will appear after optimised schedule finally being pushed to PLT.
Step 8 – Optimised Schedule in PLT (Plan)
Successful optimized schedule have been pushed and reflected to PLT. To view, go to Marine > Plan > select Date. Select voyage and click ‘More Details’ to see further.
(Continue) Optimised Schedule in PLT (Action):
Optimised schedule also have been reflected at Action page. Go to Marine > Action > select Date Range and Vessel > click ‘Search’. Click on the voyage name to see the details.