Step 1 – Generate D-30 Schedule (By Week)
Go to Schedule > Create Vessel Schedule > select Region, Supply Base, Date Range and Service Type. Then, click ‘Start Optimisation’.
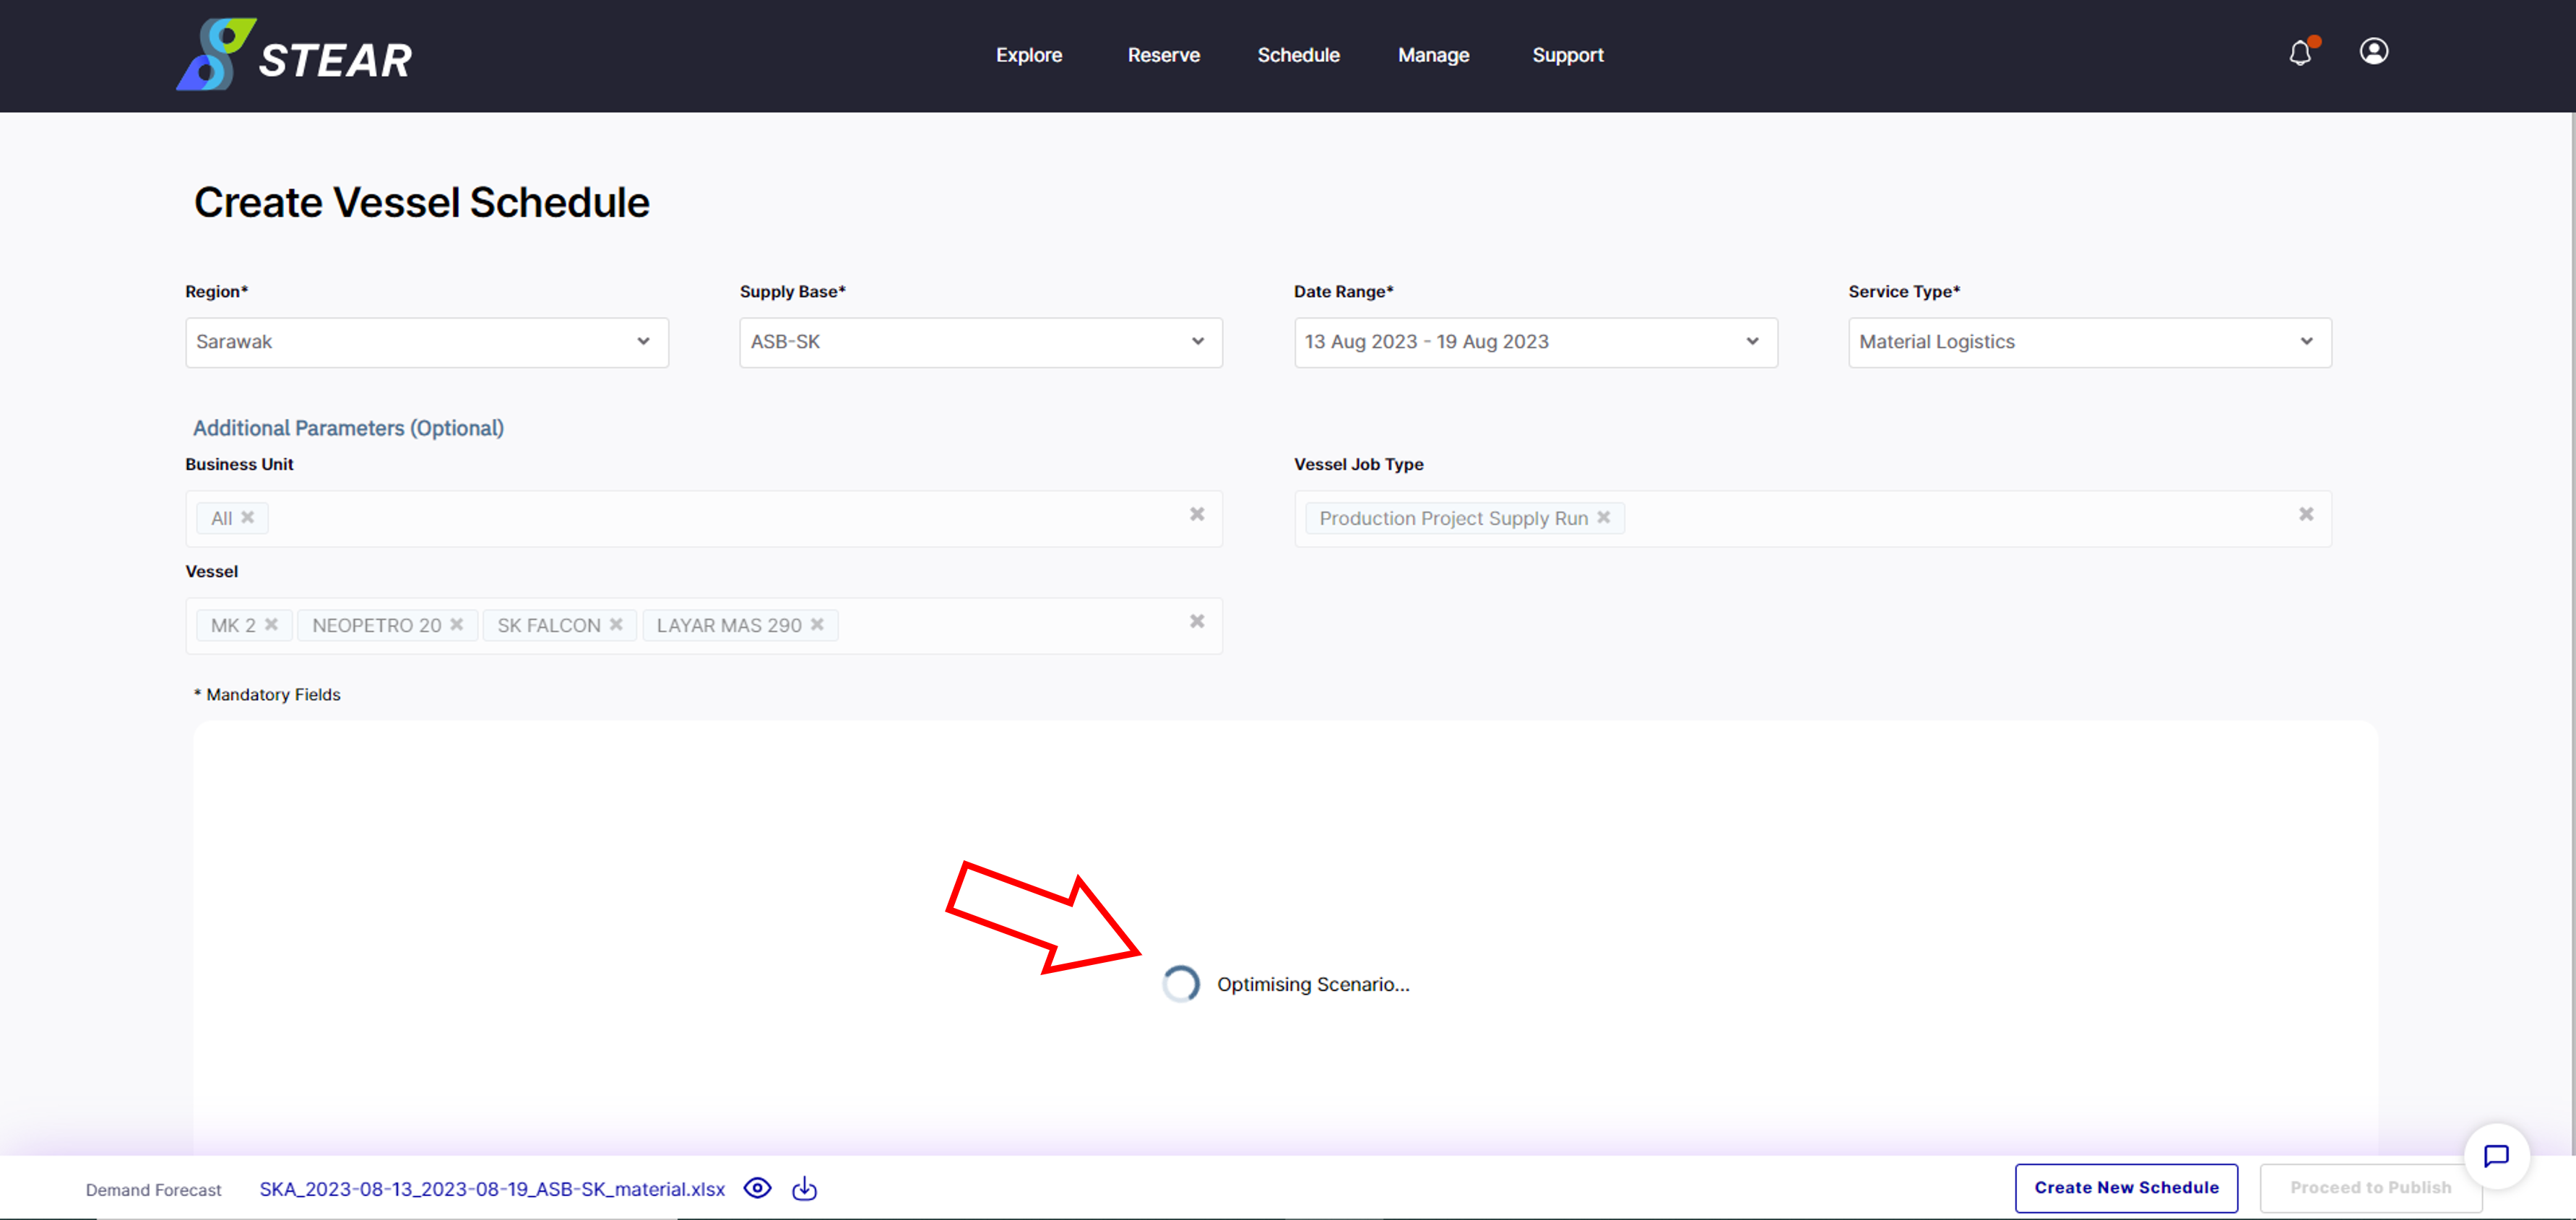
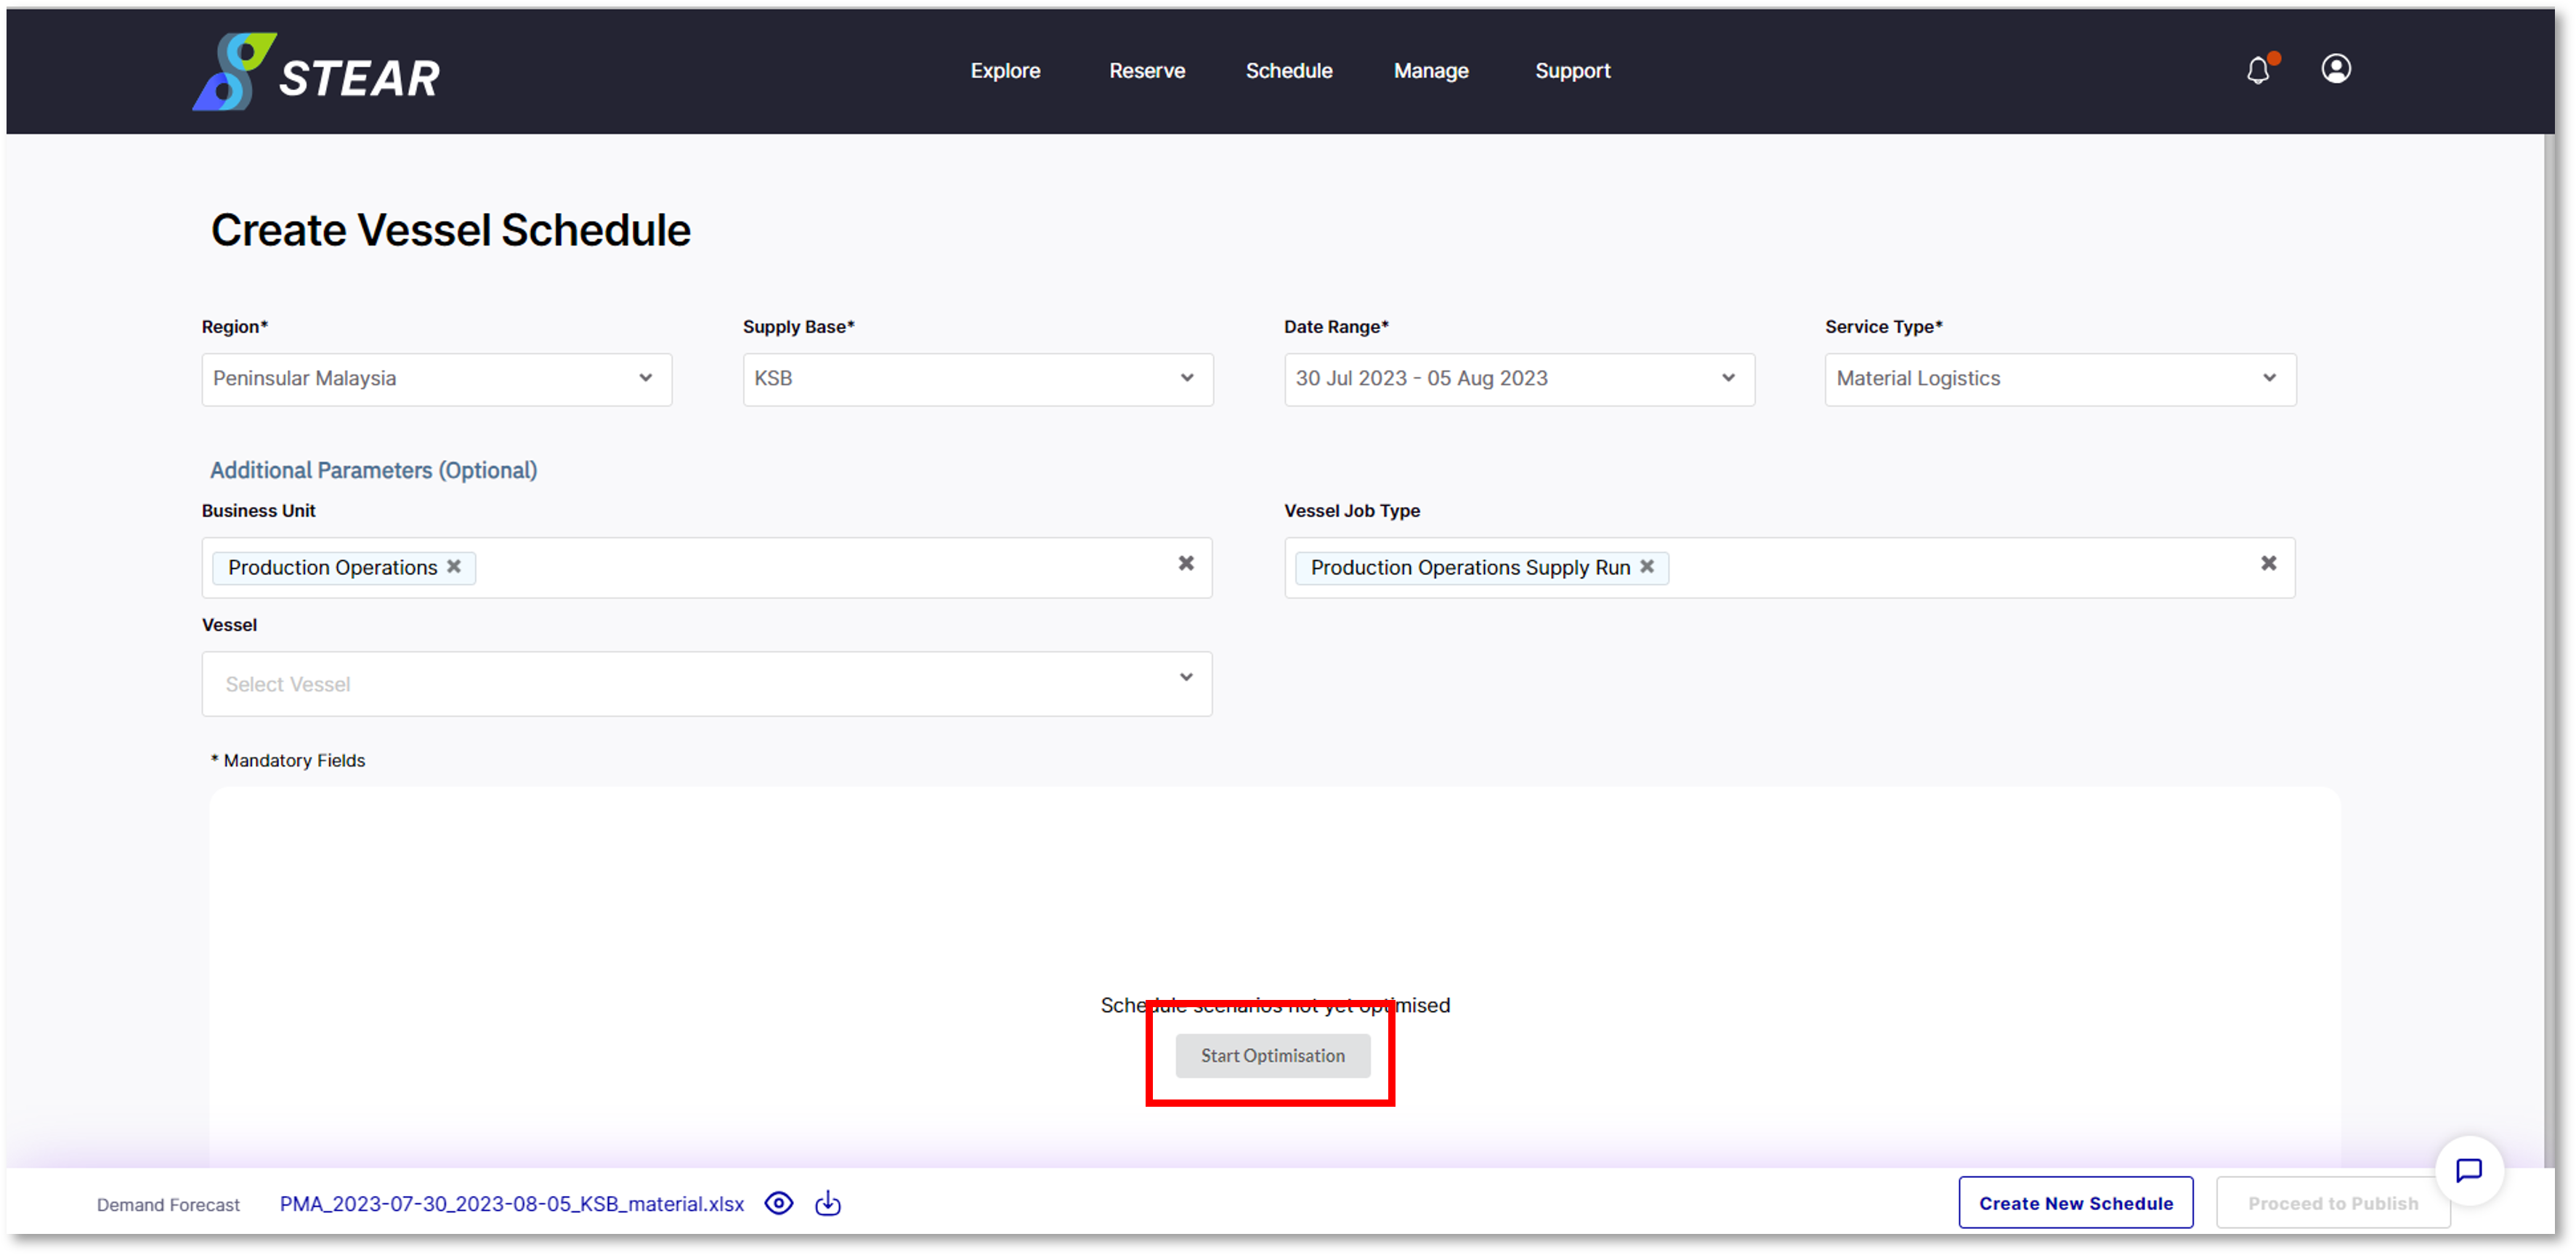 This process will take around 20 – 30 minutes to be completed.
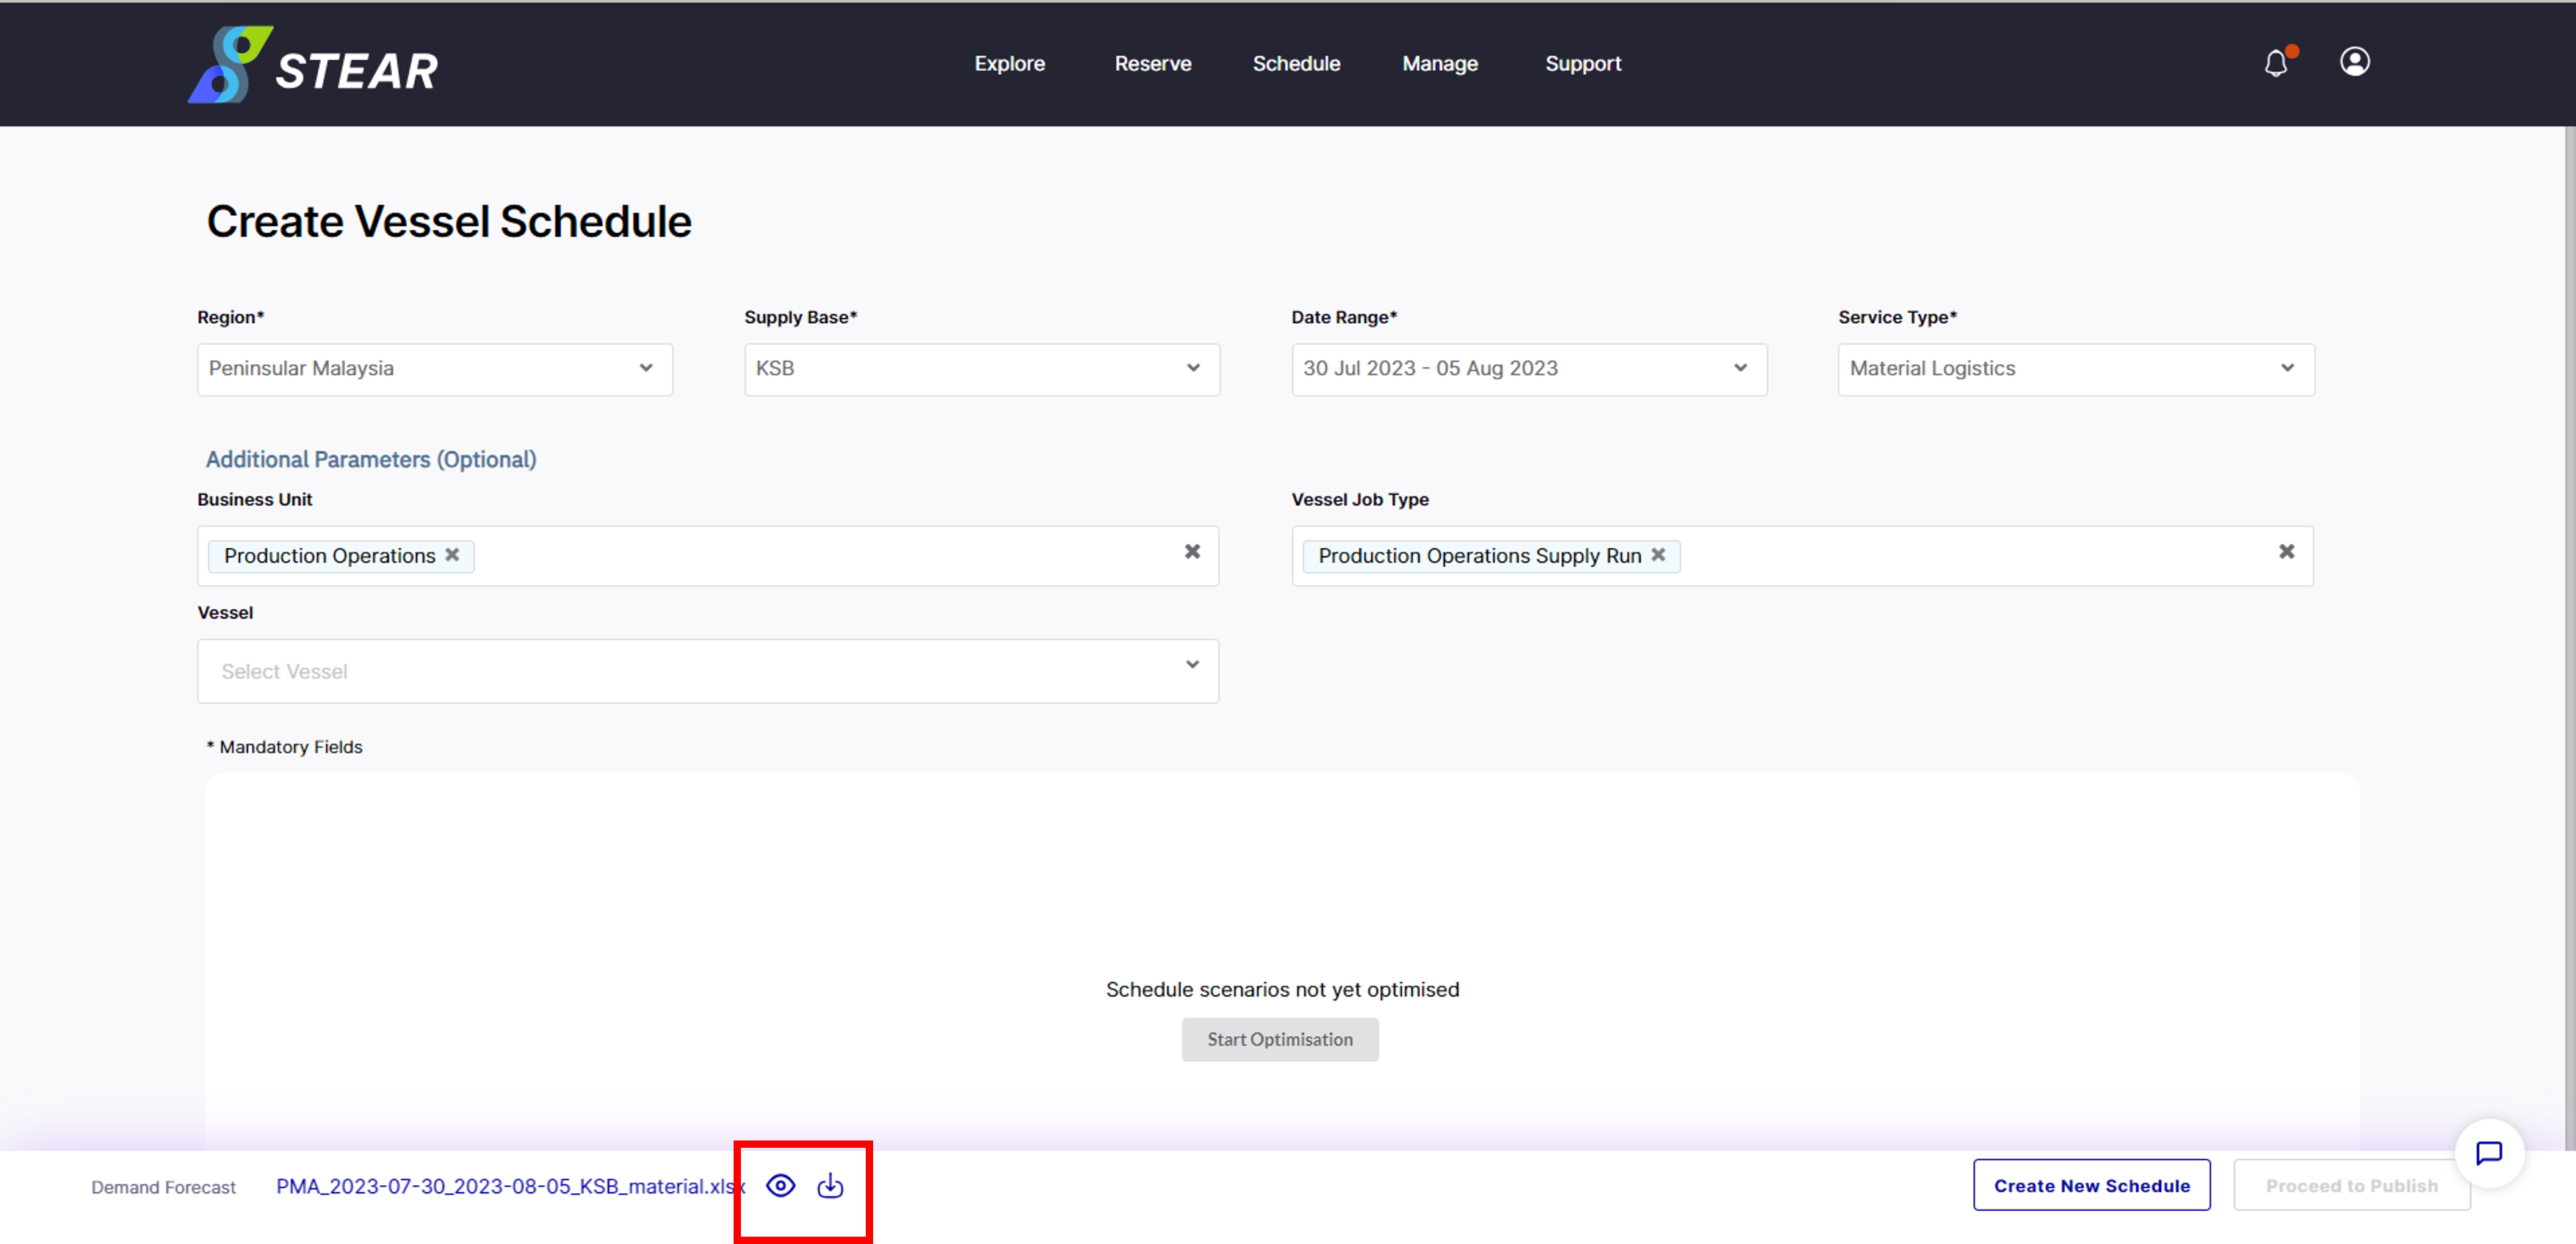
Cont. Optional Step – View Demand Forecast
To view the forecast data, click on the ‘Eye’ icon. To download data, click ‘Download’ icon.
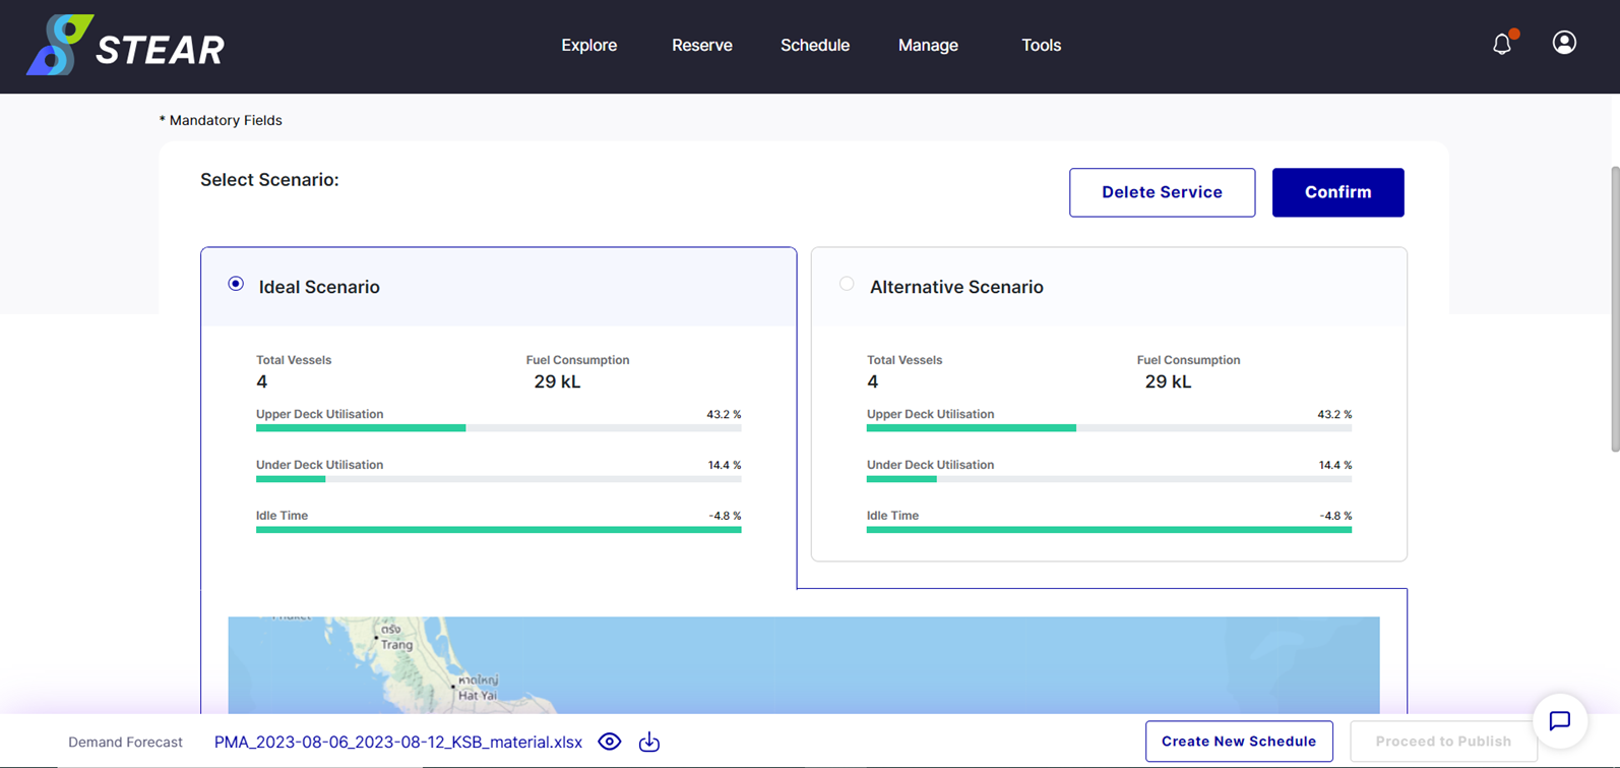
Step 2 – Select Scenario
After Optimisation is done, two options of scenario are proposed – Ideal and Alternative. Choose either scenario and scroll down to view the voyage route proposed.
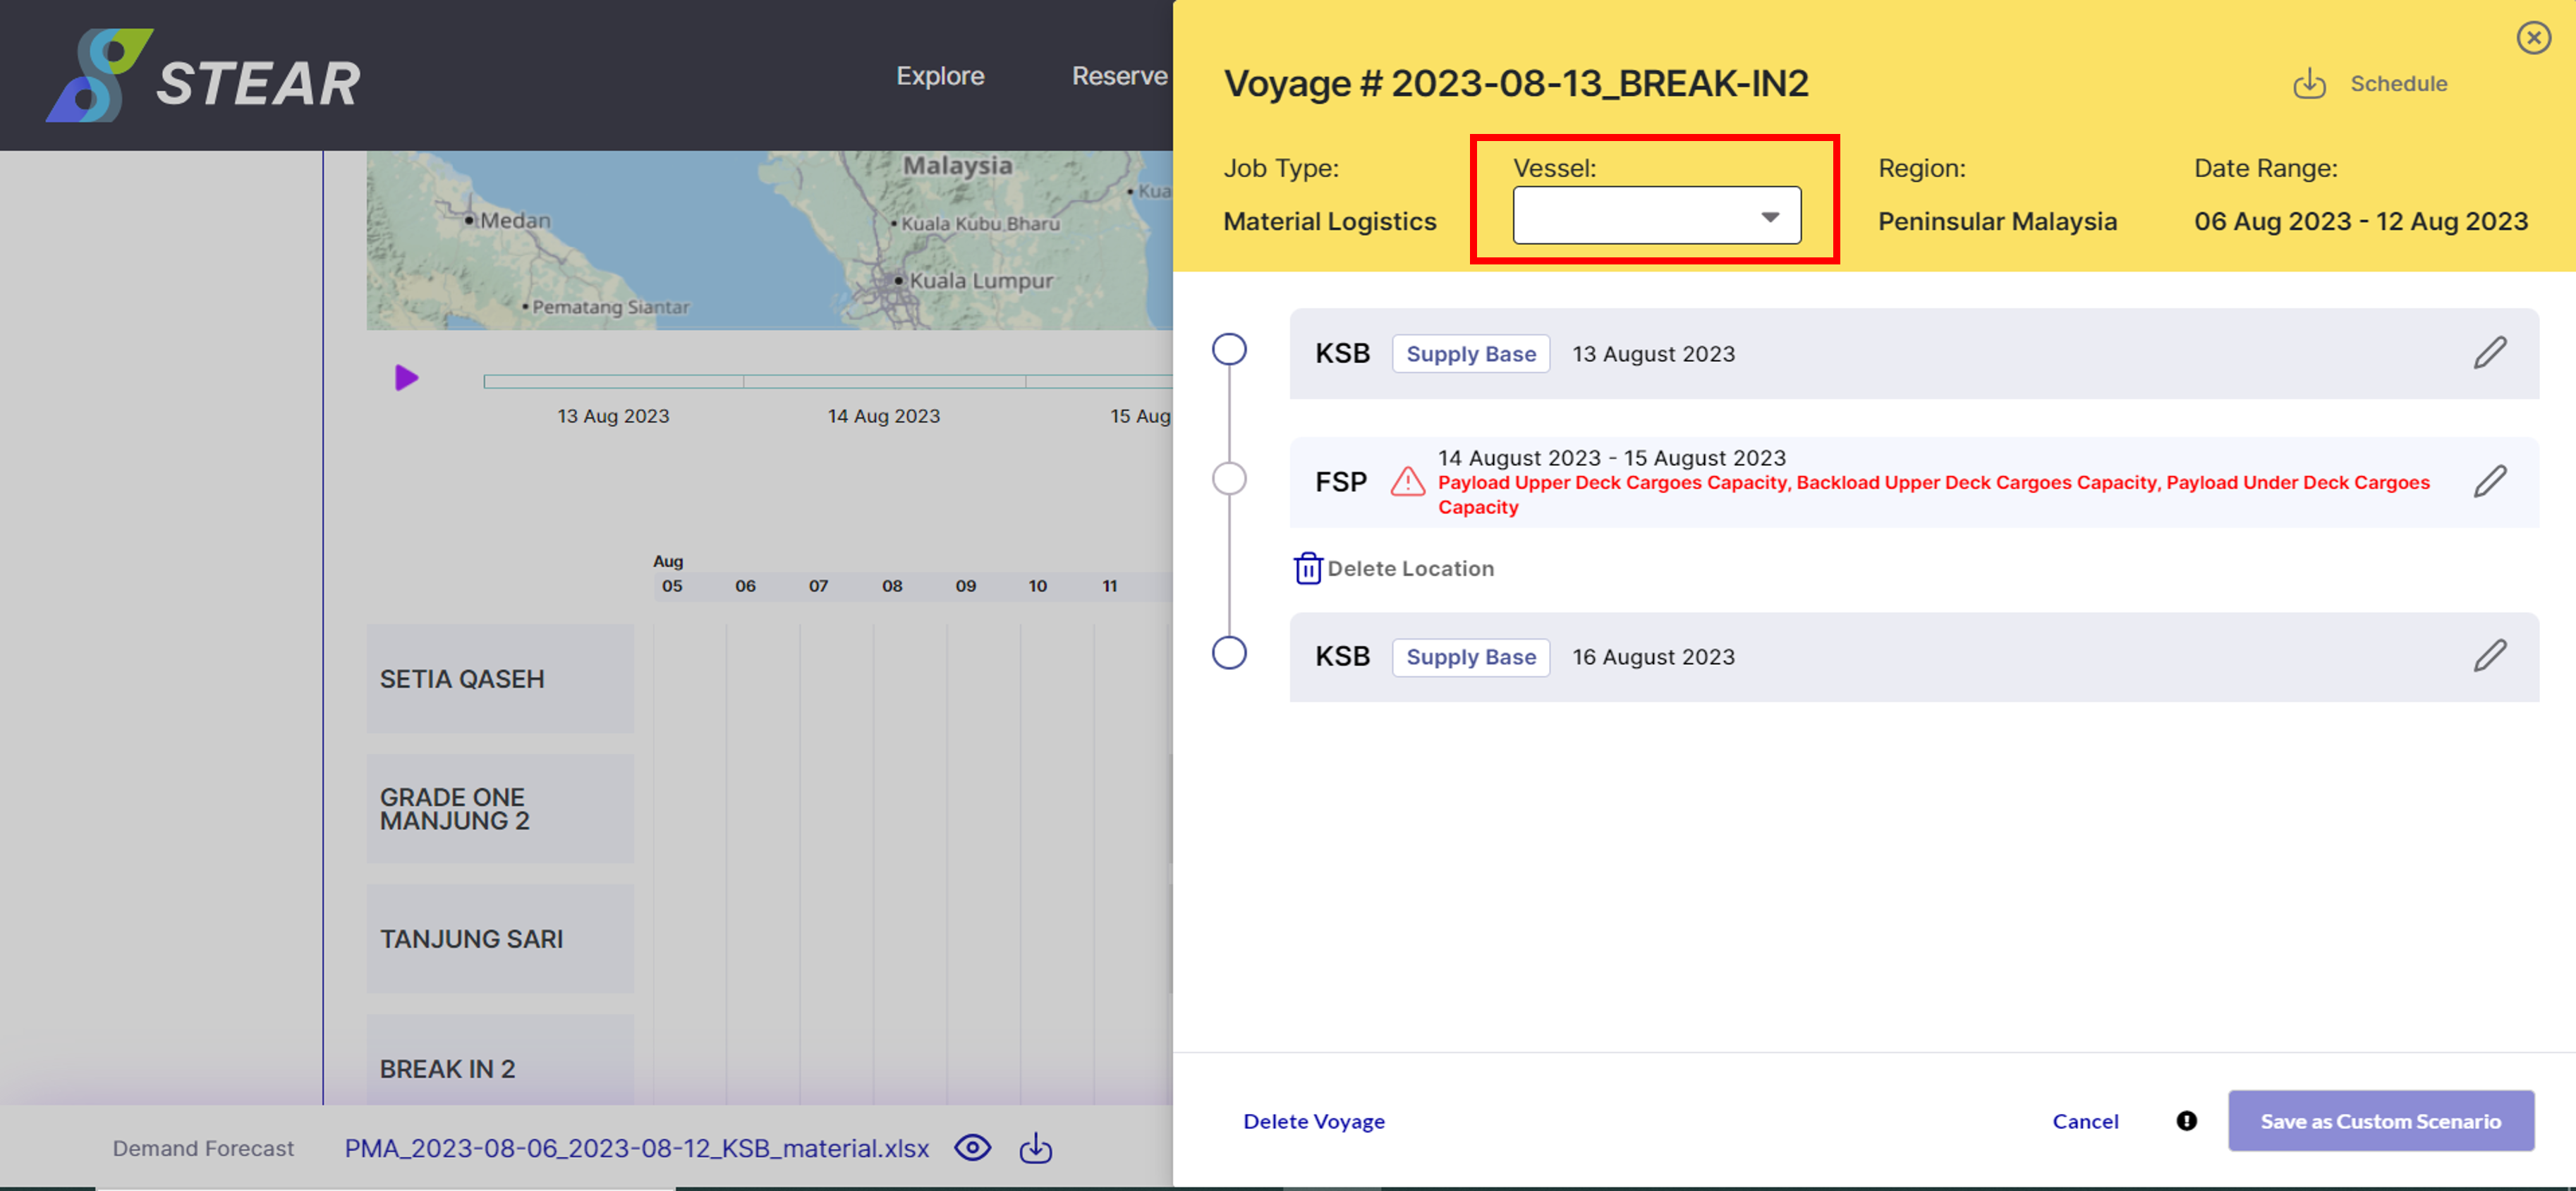
Step 3 – Modify Scenario or Assign Vessel
To modify or assign vessel for the “Break In”, click on the voyage ID and amend where necessary. Click ‘Save as Custom Scenario’ to save the changes.
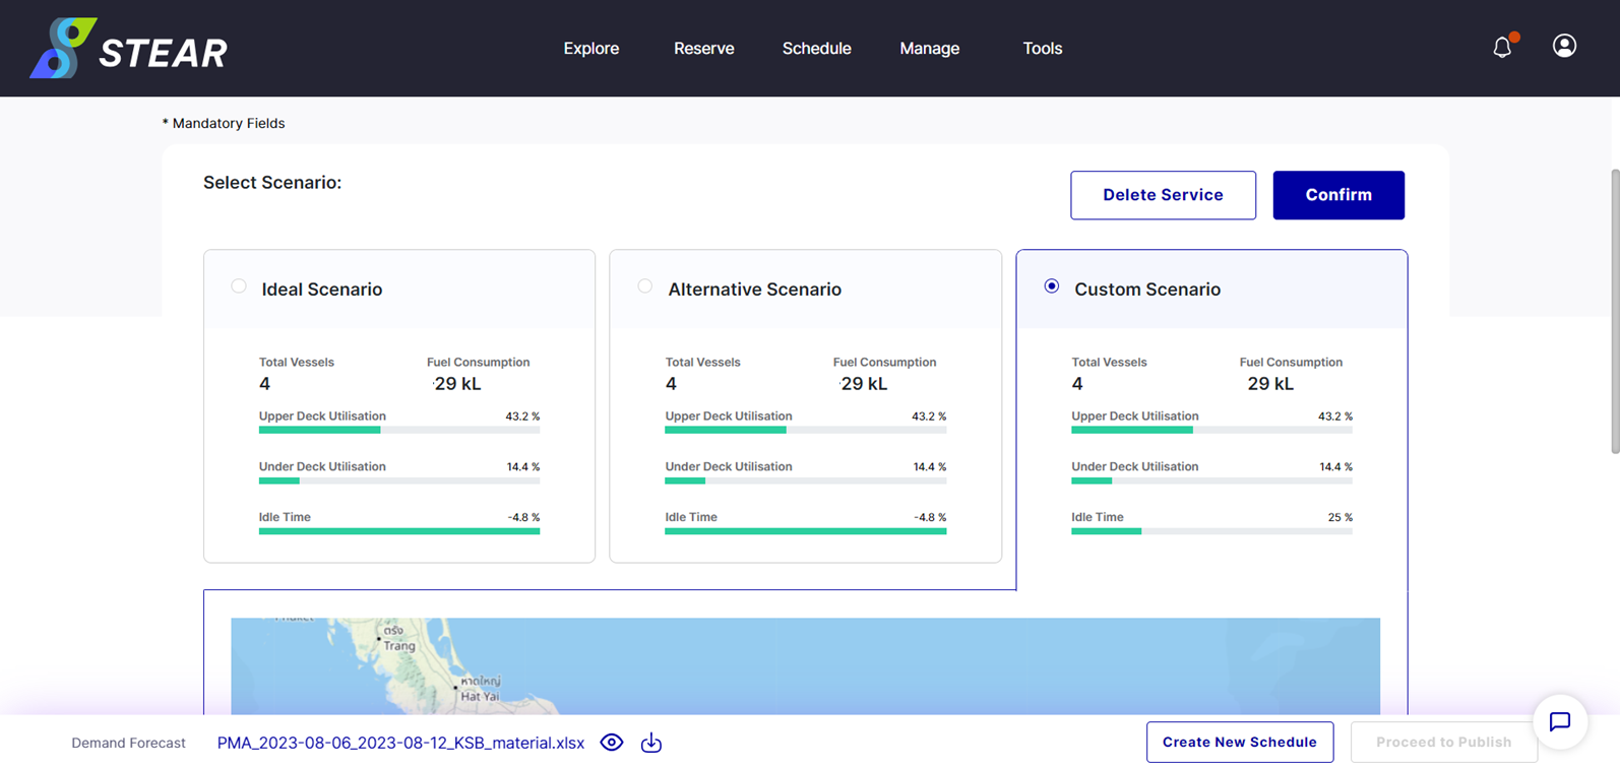
Step 4 – Select Custom Scenario
After saving the customized scenario, Custom Scenario tab will appear. Click ‘Confirm’ to view the customized proposed voyage.
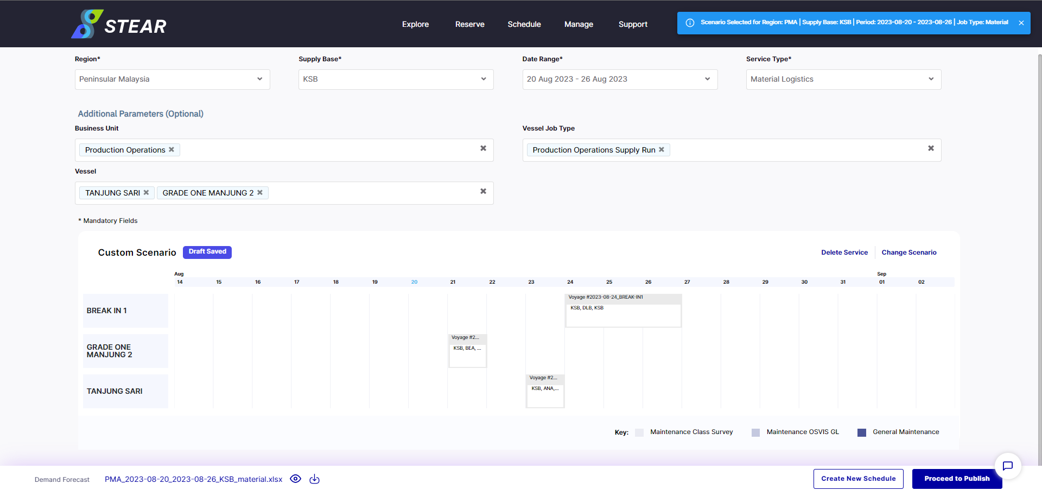
Step 5 – View Custom Scenario
Ensure the drafted schedule has the correct voyage route and vessel assigned and click ‘Proceed to Publish’.
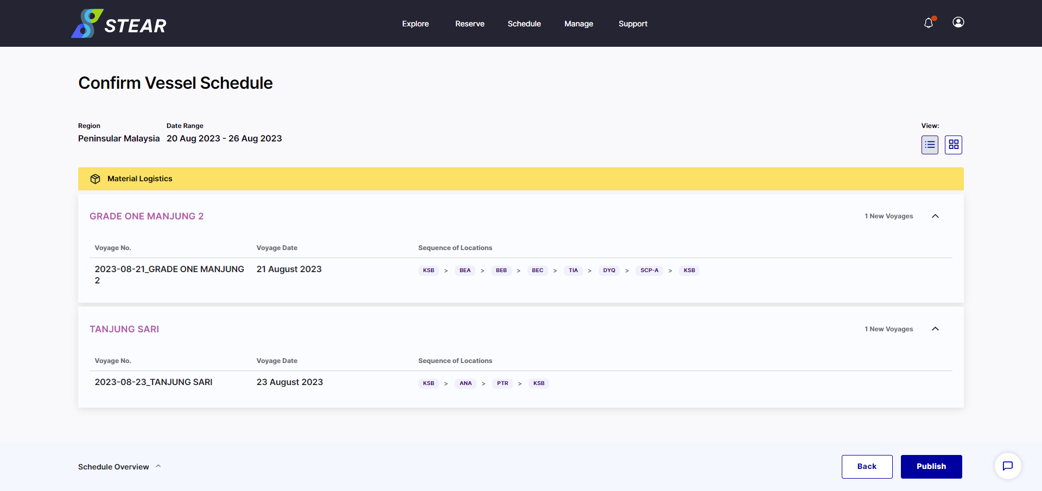
Step 6 – Confirm Vessel Schedule
Final check, once everything is good to go, click on ‘Publish’ to publish the schedule to VVS and also PLT.
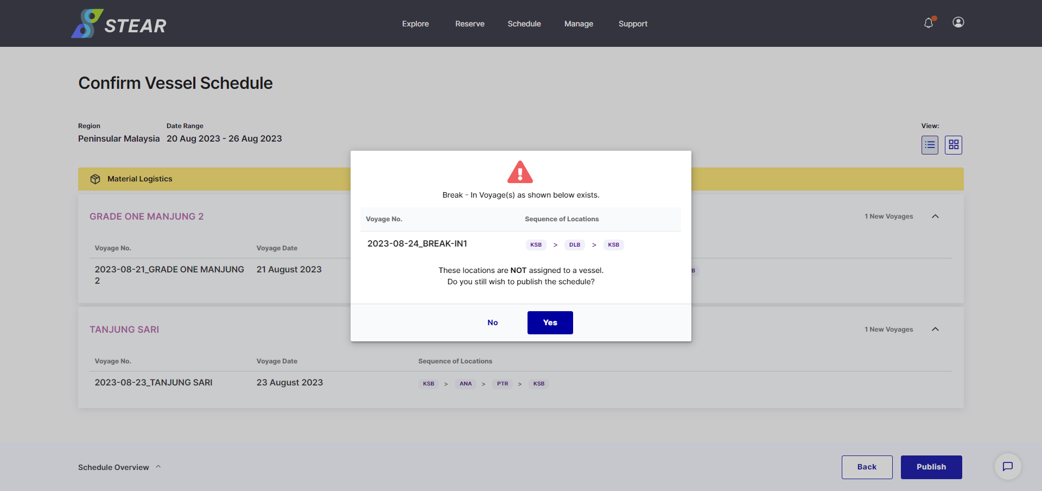
Step 7 – Publish Vessel Schedule
Schedule for break-in vessel will not be published unless user put available vessel that replacing “BREAK-IN1”. If agree, click ‘Publish’.
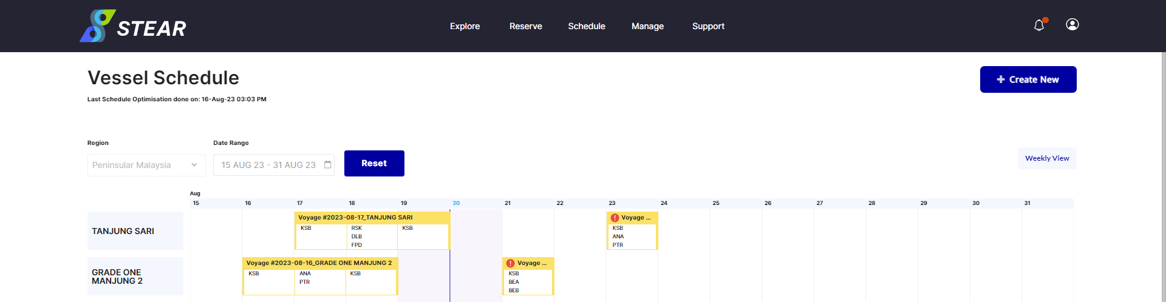
Cont. – Published Schedule
Vessel schedule with voyage details will be generated and click ‘Publish’ to confirm with the drafted schedule.
Step 8 – View Schedule in PLT (Plan)
Published voyage will be reflected to PLT. To view, go to Marine > Plan > select Date. Select voyage and click ‘More Details’ to see further.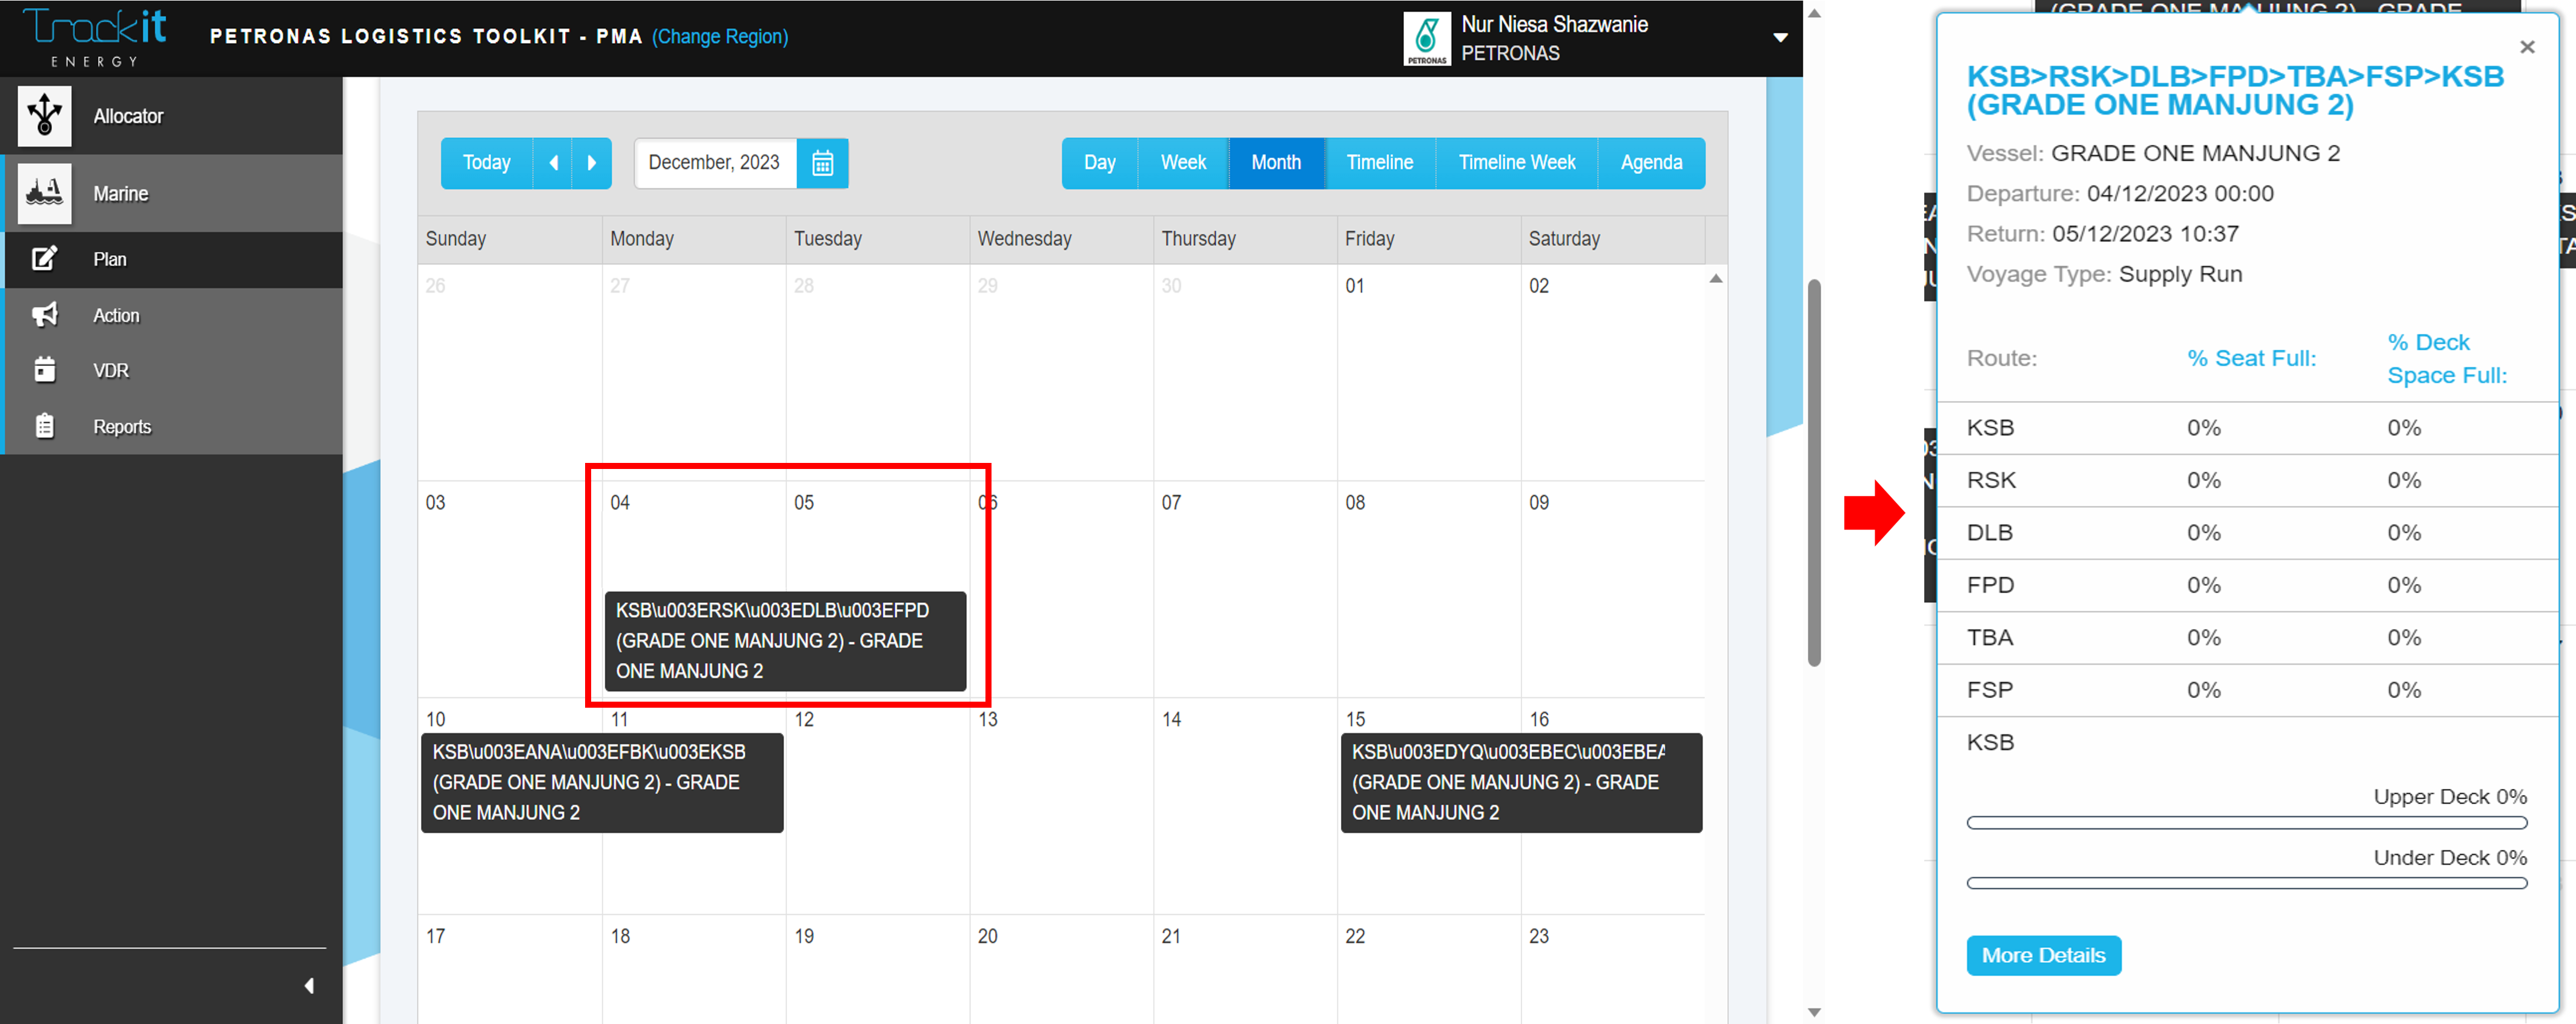
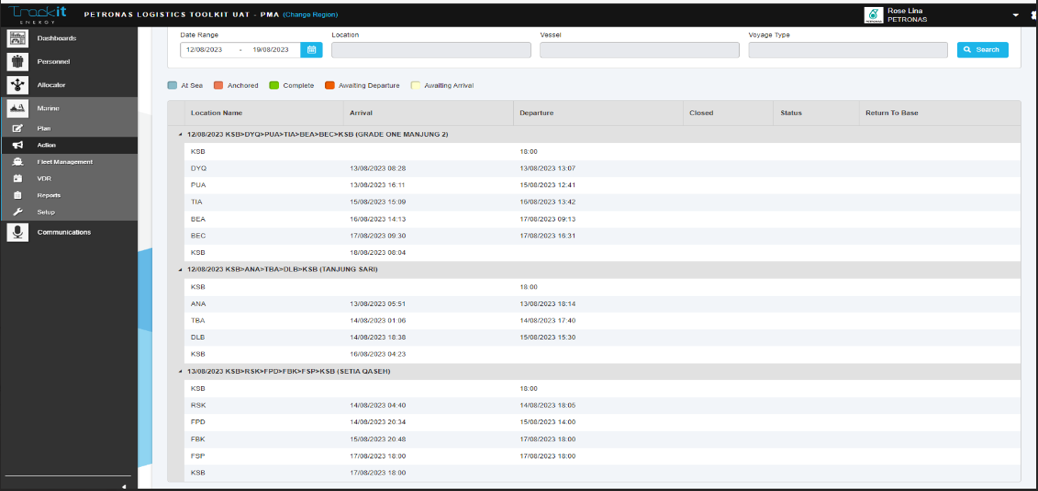
Step 9 – View Schedule in PLT (Action)
Go to Marine > Action > select Date Range and Vessel > click ‘Search’. Click on the voyage name to see the details.
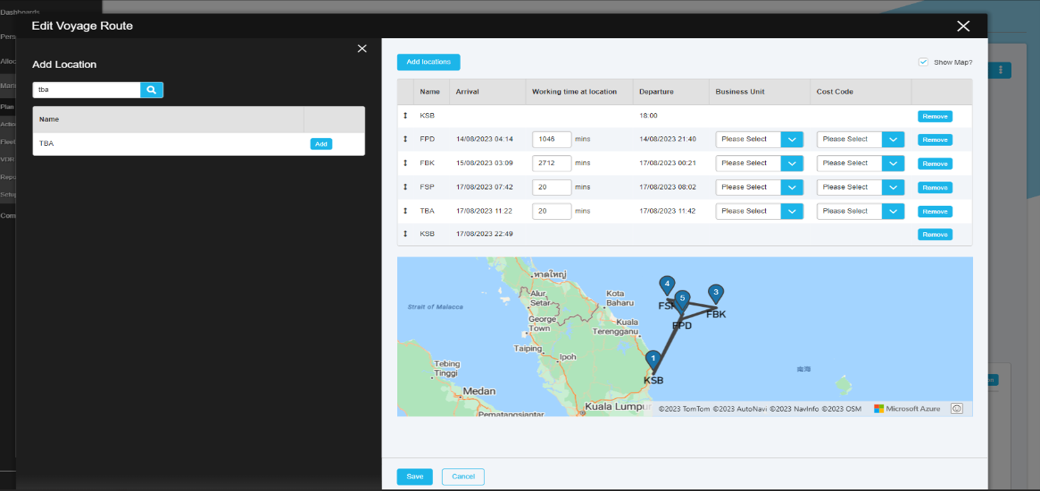
Step 10 – Edit Voyage Route
To edit the voyage, click three dots at the right upper page and click ‘Edit Voyage Route’. This tab will appear, and scheduler can edit the location by clicking ‘Add Locations’. Then, click ‘Save’.
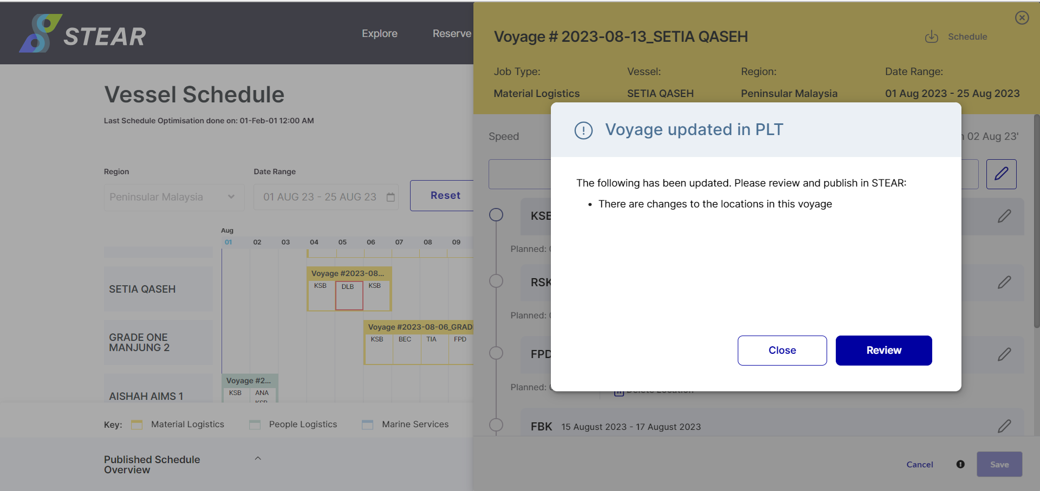
Step 11 – View Schedule in STEAR (VVS)
Successful edited schedule will also be reflected at Schedule > View Vessel Schedule (VVS). Click ‘Review’ to see the details.
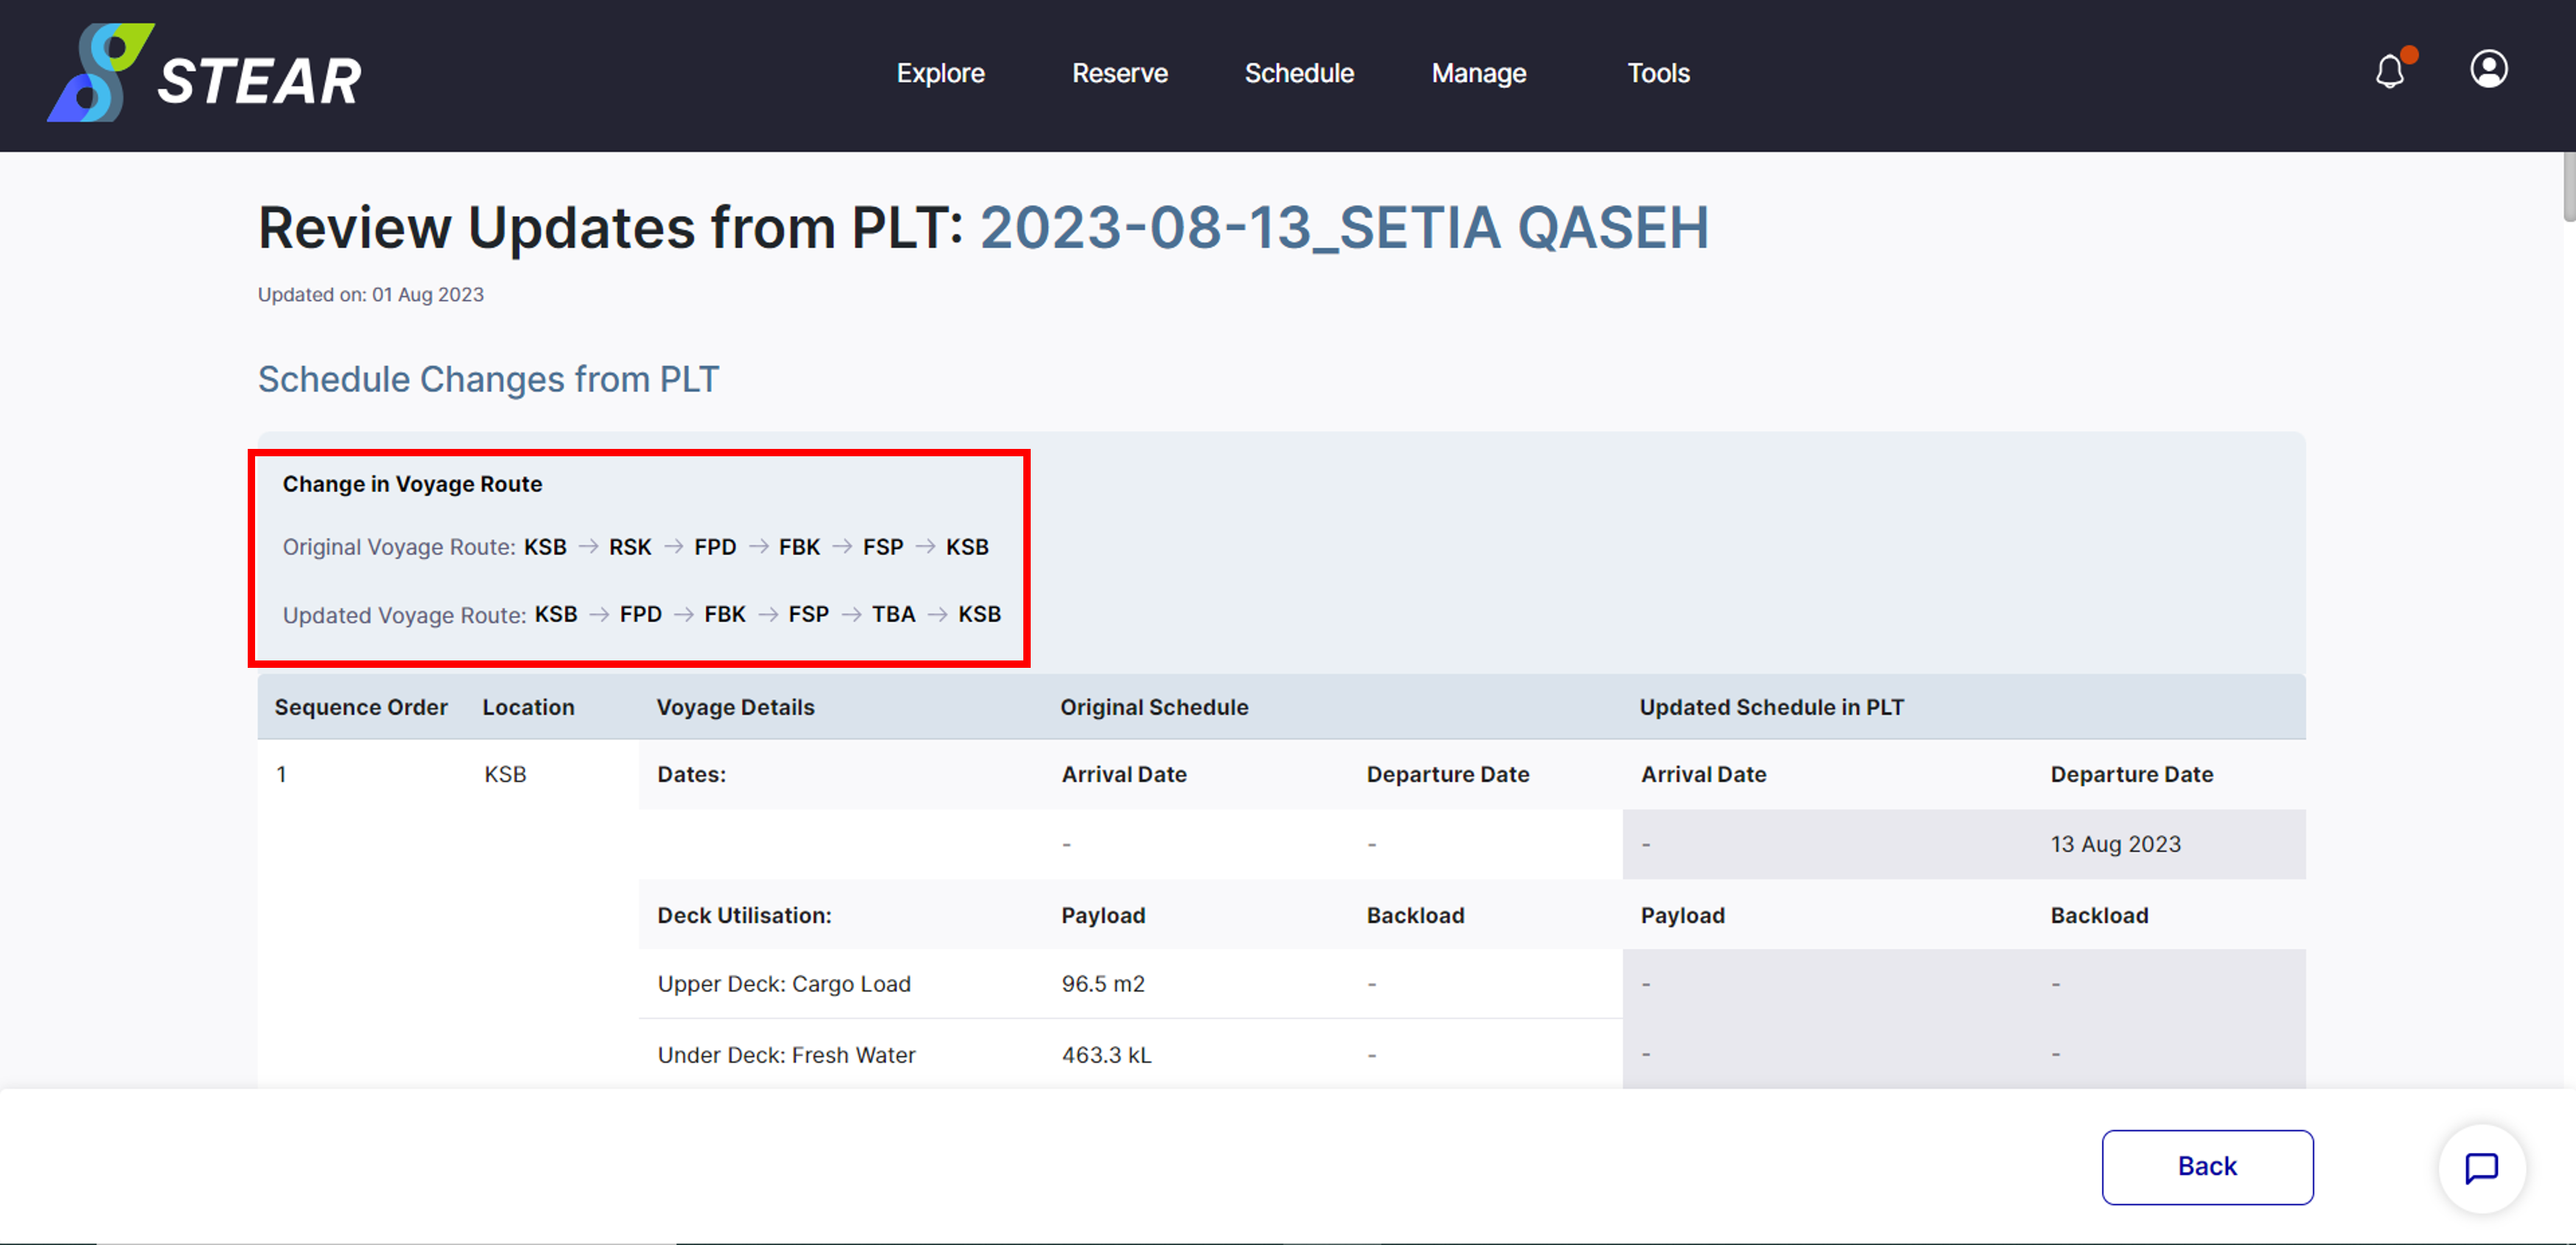
Step 12 – Details of Edited Voyage
Here are the details of Voyage Changes from PLT. Click ‘Back’ to exit this view.
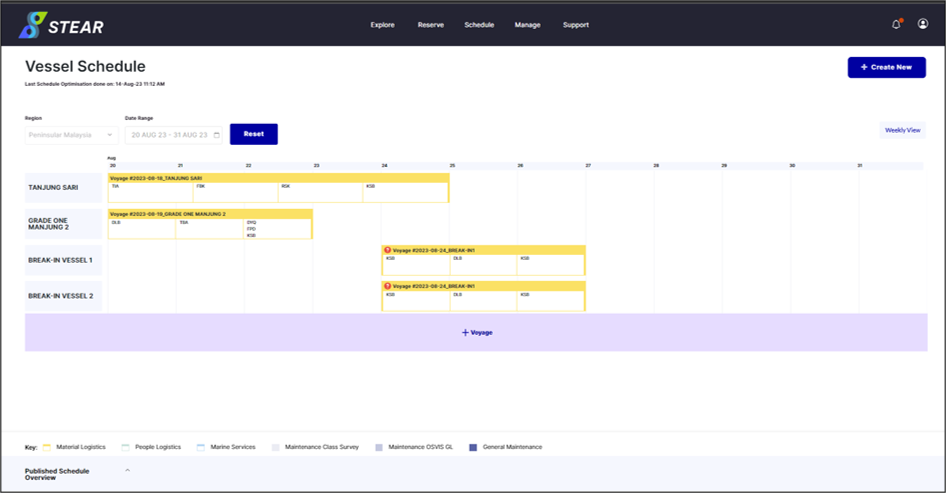
Step 13 – View Schedule in STEAR (VVS)
Successful published schedule can be view at Schedule > View Vessel Schedule (VVS).